CoCalc Logo Icon
StoreFeaturesDocsShareSupportNewsAboutSign UpSign In
huggingface

Real-time collaboration for Jupyter Notebooks, Linux Terminals, LaTeX, VS Code, R IDE, and more,
all in one place. Commercial Alternative to JupyterHub.

GitHub Repository: huggingface/notebooks
Path: blob/main/examples/segment_anything.ipynb
Views: 2535
Kernel: Python 3

Segment Anything Model using transformers 🤗 library
SnowForestMountains

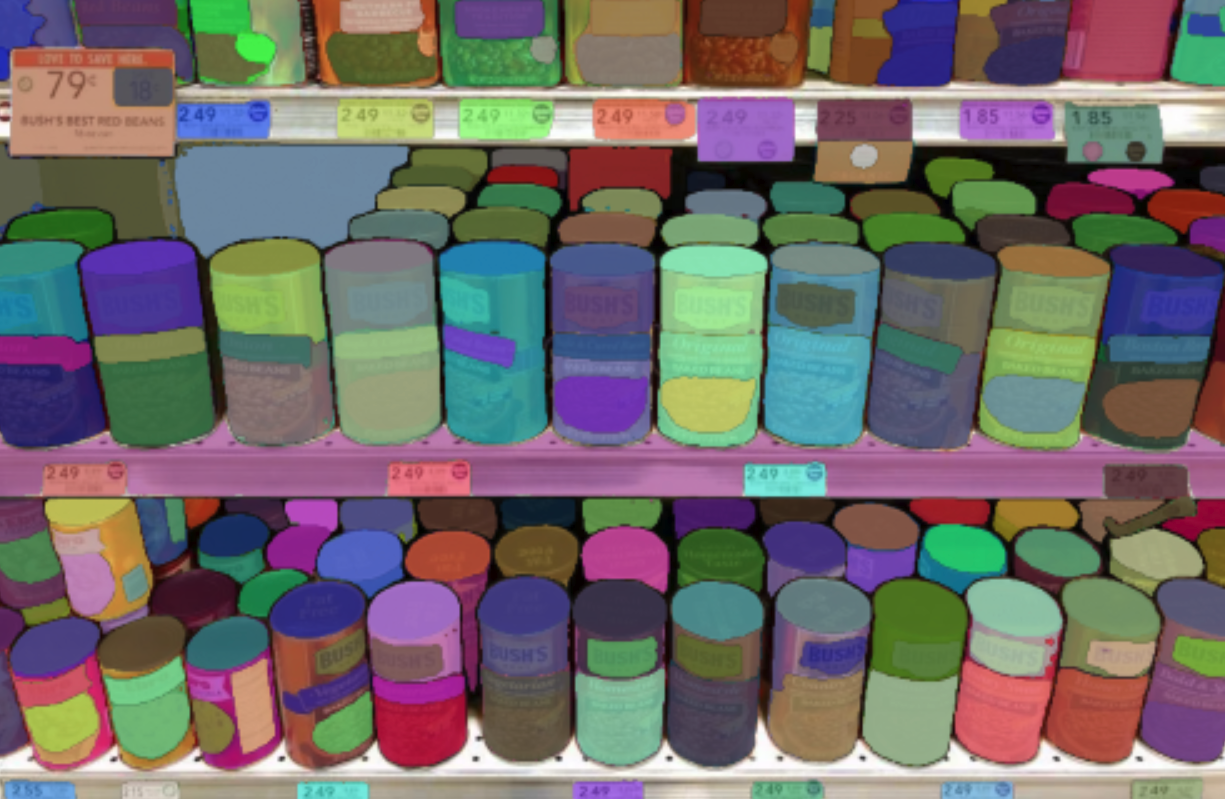
This notebook demonstrates how to use the Segment Anything Model (SAM) to segment objects in images. The model has been released by Meta AI in the paper Segment Anything Model. The original source code can be found here

This notebook demonstrates how to use transformers to leverage the different usecases of the model. The examples are heavily inspired from the original notebook of the authors.

As stated by that notebook:

The Segment Anything Model (SAM) predicts object masks given prompts that indicate the desired object. The model first converts the image into an image embedding that allows high quality masks to be efficiently produced from a prompt.

!pip install -q transformers
Installing build dependencies ... done Getting requirements to build wheel ... done Preparing metadata (pyproject.toml) ... done ━━━━━━━━━━━━━━━━━━━━━━━━━━━━━━━━━━━━━━━━ 7.8/7.8 MB 81.8 MB/s eta 0:00:00 ━━━━━━━━━━━━━━━━━━━━━━━━━━━━━━━━━━━━━━ 200.1/200.1 kB 27.2 MB/s eta 0:00:00 Building wheel for transformers (pyproject.toml) ... done

Utility functions

Run the cells below to import the needed utility functions for displaying the masks!

import numpy as np import matplotlib.pyplot as plt def show_mask(mask, ax, random_color=False): if random_color: color = np.concatenate([np.random.random(3), np.array([0.6])], axis=0) else: color = np.array([30/255, 144/255, 255/255, 0.6]) h, w = mask.shape[-2:] mask_image = mask.reshape(h, w, 1) * color.reshape(1, 1, -1) ax.imshow(mask_image) def show_box(box, ax): x0, y0 = box[0], box[1] w, h = box[2] - box[0], box[3] - box[1] ax.add_patch(plt.Rectangle((x0, y0), w, h, edgecolor='green', facecolor=(0,0,0,0), lw=2)) def show_boxes_on_image(raw_image, boxes): plt.figure(figsize=(10,10)) plt.imshow(raw_image) for box in boxes: show_box(box, plt.gca()) plt.axis('on') plt.show() def show_points_on_image(raw_image, input_points, input_labels=None): plt.figure(figsize=(10,10)) plt.imshow(raw_image) input_points = np.array(input_points) if input_labels is None: labels = np.ones_like(input_points[:, 0]) else: labels = np.array(input_labels) show_points(input_points, labels, plt.gca()) plt.axis('on') plt.show() def show_points_and_boxes_on_image(raw_image, boxes, input_points, input_labels=None): plt.figure(figsize=(10,10)) plt.imshow(raw_image) input_points = np.array(input_points) if input_labels is None: labels = np.ones_like(input_points[:, 0]) else: labels = np.array(input_labels) show_points(input_points, labels, plt.gca()) for box in boxes: show_box(box, plt.gca()) plt.axis('on') plt.show() def show_points_and_boxes_on_image(raw_image, boxes, input_points, input_labels=None): plt.figure(figsize=(10,10)) plt.imshow(raw_image) input_points = np.array(input_points) if input_labels is None: labels = np.ones_like(input_points[:, 0]) else: labels = np.array(input_labels) show_points(input_points, labels, plt.gca()) for box in boxes: show_box(box, plt.gca()) plt.axis('on') plt.show() def show_points(coords, labels, ax, marker_size=375): pos_points = coords[labels==1] neg_points = coords[labels==0] ax.scatter(pos_points[:, 0], pos_points[:, 1], color='green', marker='*', s=marker_size, edgecolor='white', linewidth=1.25) ax.scatter(neg_points[:, 0], neg_points[:, 1], color='red', marker='*', s=marker_size, edgecolor='white', linewidth=1.25) def show_masks_on_image(raw_image, masks, scores): if len(masks.shape) == 4: masks = masks.squeeze() if scores.shape[0] == 1: scores = scores.squeeze() nb_predictions = scores.shape[-1] fig, axes = plt.subplots(1, nb_predictions, figsize=(15, 15)) for i, (mask, score) in enumerate(zip(masks, scores)): mask = mask.cpu().detach() axes[i].imshow(np.array(raw_image)) show_mask(mask, axes[i]) axes[i].title.set_text(f"Mask {i+1}, Score: {score.item():.3f}") axes[i].axis("off") plt.show()

Model loading

Use the from_pretrained method on the SamForMaskGeneration class to load the model from the Hub! For the sake of this demonstration we will use the vit-huge checkpoint.

import torch from transformers import SamModel, SamProcessor device = torch.device("cuda" if torch.cuda.is_available() else "cpu") model = SamModel.from_pretrained("facebook/sam-vit-huge").to(device) processor = SamProcessor.from_pretrained("facebook/sam-vit-huge")
/home/younes_huggingface_co/miniconda3/envs/fix-test/lib/python3.9/site-packages/tqdm/auto.py:22: TqdmWarning: IProgress not found. Please update jupyter and ipywidgets. See https://ipywidgets.readthedocs.io/en/stable/user_install.html from .autonotebook import tqdm as notebook_tqdm
===================================BUG REPORT=================================== Welcome to bitsandbytes. For bug reports, please run python -m bitsandbytes and submit this information together with your error trace to: https://github.com/TimDettmers/bitsandbytes/issues ================================================================================ bin /home/younes_huggingface_co/miniconda3/envs/fix-test/lib/python3.9/site-packages/bitsandbytes/libbitsandbytes_cuda113.so CUDA SETUP: CUDA runtime path found: /usr/local/cuda/lib64/libcudart.so.11.0 CUDA SETUP: Highest compute capability among GPUs detected: 7.5 CUDA SETUP: Detected CUDA version 113 CUDA SETUP: Loading binary /home/younes_huggingface_co/miniconda3/envs/fix-test/lib/python3.9/site-packages/bitsandbytes/libbitsandbytes_cuda113.so...
/home/younes_huggingface_co/miniconda3/envs/fix-test/lib/python3.9/site-packages/bitsandbytes/cuda_setup/main.py:149: UserWarning: /home/younes_huggingface_co/miniconda3/envs/fix-test did not contain ['libcudart.so', 'libcudart.so.11.0', 'libcudart.so.12.0'] as expected! Searching further paths... warn(msg)
Setting ds_accelerator to cuda (auto detect)
2023-07-11 05:59:57.304661: W tensorflow/compiler/xla/stream_executor/platform/default/dso_loader.cc:64] Could not load dynamic library 'libnvinfer.so.7'; dlerror: libnvinfer.so.7: cannot open shared object file: No such file or directory; LD_LIBRARY_PATH: /usr/local/cuda/lib64:/usr/local/nccl2/lib:/usr/local/cuda/extras/CUPTI/lib64:/usr/local/cuda/lib64:/usr/local/nccl2/lib:/usr/local/cuda/extras/CUPTI/lib64 2023-07-11 05:59:57.304798: W tensorflow/compiler/xla/stream_executor/platform/default/dso_loader.cc:64] Could not load dynamic library 'libnvinfer_plugin.so.7'; dlerror: libnvinfer_plugin.so.7: cannot open shared object file: No such file or directory; LD_LIBRARY_PATH: /usr/local/cuda/lib64:/usr/local/nccl2/lib:/usr/local/cuda/extras/CUPTI/lib64:/usr/local/cuda/lib64:/usr/local/nccl2/lib:/usr/local/cuda/extras/CUPTI/lib64 2023-07-11 05:59:57.304810: W tensorflow/compiler/tf2tensorrt/utils/py_utils.cc:38] TF-TRT Warning: Cannot dlopen some TensorRT libraries. If you would like to use Nvidia GPU with TensorRT, please make sure the missing libraries mentioned above are installed properly. Downloading (…)lve/main/config.json: 100%|██████████| 6.57k/6.57k [00:00<00:00, 847kB/s] Downloading pytorch_model.bin: 100%|██████████| 2.56G/2.56G [00:14<00:00, 181MB/s] Downloading (…)rocessor_config.json: 100%|██████████| 466/466 [00:00<00:00, 76.2kB/s]

Run predictions

Let's deeply dive into how you can run different type of predictions, given different inputs. You will see how to

  • Generate segmentation masks given a 2D localization

  • Generate segmentation masks per given localization (one prediction per 2D point)

  • Generate segmentation masks given a bounding box

  • Generate segmentation masks given a bounding box and a 2D points

  • Generate multiple segmentatation masks per image

Load the example image

from PIL import Image import requests img_url = "https://huggingface.co/ybelkada/segment-anything/resolve/main/assets/car.png" raw_image = Image.open(requests.get(img_url, stream=True).raw).convert("RGB") plt.imshow(raw_image)
<matplotlib.image.AxesImage at 0x7fe982be84f0>
Image in a Jupyter notebook

Step 1: Retrieve the image embeddings

In order to avoid computing multiple times the same image embeddings, we will compute it only once, and use these embeddings to directly feed them to the model for faster inference

inputs = processor(raw_image, return_tensors="pt").to(device) image_embeddings = model.get_image_embeddings(inputs["pixel_values"])

Usecase 1: Feed a set of 2D points to predict a mask

Let's first focus on the first classic usecase of SAM. You can feed the model a set of 2D points to predict a segmentation mask. The more you provide 2D points, the better the resulting mask will be.

In this example, let's try to predict the mask that corresponds to the top left window of the parked car.

The input points needs to be in the format:

nb_images, nb_predictions, nb_points_per_mask, 2

With SAM you can either predict a single prediction given multiple points, or a prediction per point. This is denoted by nb_predictions dimension. We will see in the next sections how to perform this type of prediction

input_points = [[[450, 600]]] show_points_on_image(raw_image, input_points[0])
Image in a Jupyter notebook

For that, simply pass the raw image, the points

inputs = processor(raw_image, input_points=input_points, return_tensors="pt").to(device) # pop the pixel_values as they are not neded inputs.pop("pixel_values", None) inputs.update({"image_embeddings": image_embeddings}) with torch.no_grad(): outputs = model(**inputs) masks = processor.image_processor.post_process_masks(outputs.pred_masks.cpu(), inputs["original_sizes"].cpu(), inputs["reshaped_input_sizes"].cpu()) scores = outputs.iou_scores
show_masks_on_image(raw_image, masks[0], scores)
Image in a Jupyter notebook

As you can see, the predicted masks are sorted in their IoU score order. The first mask indeed seems to correspond to the mask of the top right window of the parked car.

You can also feed a set of points to predict a single mask. Let's try to predict a mask, given two points

input_points = [[[550, 600], [2100, 1000]]] show_points_on_image(raw_image, input_points)
Image in a Jupyter notebook
inputs = processor(raw_image, input_points=input_points, return_tensors="pt").to(device) # pop the pixel_values as they are not neded inputs.pop("pixel_values", None) inputs.update({"image_embeddings": image_embeddings}) with torch.no_grad(): outputs = model(**inputs) masks = processor.image_processor.post_process_masks(outputs.pred_masks.cpu(), inputs["original_sizes"].cpu(), inputs["reshaped_input_sizes"].cpu()) scores = outputs.iou_scores
show_masks_on_image(raw_image, masks[0], scores)
Image in a Jupyter notebook

Usecase 2: Predict segmentations masks using bounding boxes

It is possible to feed bounding boxes to the model to predict segmentation masks of the object of interest in that region.

The bounding box needs to be a list of points, corresponding to the flattened coordinates of the top left point, and bottom right point of the bounding box. Let's look at an example below

input_boxes = [[[650, 900, 1000, 1250]]] show_boxes_on_image(raw_image, input_boxes[0])
Image in a Jupyter notebook

We will try to segment the wheel that is present inside the bounding box! For that just run the following snippet

inputs = processor(raw_image, input_boxes=[input_boxes], return_tensors="pt").to(device) inputs["input_boxes"].shape
torch.Size([1, 1, 4])
inputs.pop("pixel_values", None) inputs.update({"image_embeddings": image_embeddings}) with torch.no_grad(): outputs = model(**inputs) masks = processor.image_processor.post_process_masks(outputs.pred_masks.cpu(), inputs["original_sizes"].cpu(), inputs["reshaped_input_sizes"].cpu()) scores = outputs.iou_scores
show_masks_on_image(raw_image, masks[0], scores)
Image in a Jupyter notebook

It is possible to feed multiple boxes, however, this will lead to having one prediction per bounding box. i.e., you cannot combine multiple bounding boxes to get a single prediction. However, you can combine points and bounding boxes to get a prediction, and we will cover that in the next section

Usecase 3: Predict segmentation masks given points and bounding boxes

input_boxes = [[[650, 900, 1000, 1250]]] input_points = [[[820, 1080]]] show_points_and_boxes_on_image(raw_image, input_boxes[0], input_points[0])
Image in a Jupyter notebook
inputs = processor(raw_image, input_boxes=[input_boxes], input_points=[input_points], return_tensors="pt").to(device) inputs.pop("pixel_values", None) inputs.update({"image_embeddings": image_embeddings}) with torch.no_grad(): outputs = model(**inputs) masks = processor.image_processor.post_process_masks(outputs.pred_masks.cpu(), inputs["original_sizes"].cpu(), inputs["reshaped_input_sizes"].cpu()) scores = outputs.iou_scores
show_masks_on_image(raw_image, masks[0][0], scores[:, 0, :])
Image in a Jupyter notebook

You can also pass points with a label to segment out that region. Let us have a deeper look below

input_boxes = [[[650, 900, 1000, 1250]]] input_points = [[[820, 1080]]] labels = [0] show_points_and_boxes_on_image(raw_image, input_boxes[0], input_points[0], labels)
Image in a Jupyter notebook
input_boxes = [[[620, 900, 1000, 1255]]] input_points = [[[820, 1080]]] labels = [[0]] inputs = processor(raw_image, input_boxes=[input_boxes], input_points=[input_points], input_labels=[labels], return_tensors="pt").to(device) inputs.pop("pixel_values", None) inputs.update({"image_embeddings": image_embeddings}) with torch.no_grad(): outputs = model(**inputs) masks = processor.image_processor.post_process_masks(outputs.pred_masks.cpu(), inputs["original_sizes"].cpu(), inputs["reshaped_input_sizes"].cpu()) scores = outputs.iou_scores
show_masks_on_image(raw_image, masks[0][0], scores[:, 0, :])
Image in a Jupyter notebook

As you can see, the model managed to "ignore" the component that was specified by the point with the label 0.

Usecase 4: Predict multiple masks per image

With SAM, you can also predict multiple masks per image. You can achieve that in two possible scenarios

  • Feed multiple points in the nb_predictions dimension

  • Feed multiple bounding boxes to the same image

input_points = [[[850, 1100], [2250, 1000]]] show_points_on_image(raw_image, input_points)
Image in a Jupyter notebook

Sub-usecase 1: one prediction per point

To benefit from what we have described in the first bullet point, just change the input array to

input_points = [[[850, 1100]], [[2250, 1000]]]

In order to add the desired dimension, and pass it to the SamProcessor

input_points = [[[[850, 1100]], [[2250, 1000]]]] inputs = processor(raw_image, input_points=input_points, return_tensors="pt").to(device) inputs["input_points"].shape
torch.Size([1, 2, 1, 2])
inputs.pop("pixel_values", None) inputs.update({"image_embeddings": image_embeddings}) with torch.no_grad(): outputs = model(**inputs) masks = processor.image_processor.post_process_masks(outputs.pred_masks.cpu(), inputs["original_sizes"].cpu(), inputs["reshaped_input_sizes"].cpu()) scores = outputs.iou_scores

Let's print the shapes of the output to understand better what is going on

scores.shape
torch.Size([1, 2, 3])

Here the first dimension corresponds to the image batch size, the second dimension corresponds to the nb_predictions dimension. And the last dimension is the number of predicted masks per prediction , and it is set to 3 by default according to the official implementation

show_masks_on_image(raw_image, masks[0][0], scores[:, 0, :])
Image in a Jupyter notebook
show_masks_on_image(raw_image, masks[0][1], scores[:, 0, :])
Image in a Jupyter notebook

Sub-usecase 2: Feed multiple bounding boxes to the same image

You can also feed multiple bounding boxes to the same image and get one prediction per bounding box.

input_boxes = [[[650, 900, 1000, 1250], [2050, 800, 2400, 1150]]] show_boxes_on_image(raw_image, input_boxes[0])
Image in a Jupyter notebook

Just pass the input boxes as follows, to match the convention of the processor

input_boxes = [[[650, 900, 1000, 1250], [2050, 800, 2400, 1150]]] inputs = processor(raw_image, input_boxes=input_boxes, return_tensors="pt").to(device) inputs["input_boxes"].shape
torch.Size([1, 2, 4])

This time, let's just output a single mask per box, for that we can just pass multimask_output=False in the forward pass

inputs.pop("pixel_values", None) inputs.update({"image_embeddings": image_embeddings}) with torch.no_grad(): outputs = model(**inputs, multimask_output=False) masks = processor.image_processor.post_process_masks(outputs.pred_masks.cpu(), inputs["original_sizes"].cpu(), inputs["reshaped_input_sizes"].cpu()) scores = outputs.iou_scores
scores.shape
torch.Size([1, 2, 1])

As you can see, here we have predicted 2 masks in total! Let's check them now

show_masks_on_image(raw_image, masks[0], scores)
Image in a Jupyter notebook