Path: blob/master/guides/keras_hub/getting_started.py
8214 views
"""1Title: Getting Started with KerasHub2Author: [Matthew Watson](https://github.com/mattdangerw/), [Jonathan Bischof](https://github.com/jbischof)3Date created: 2022/12/154Last modified: 2024/10/175Description: An introduction to the KerasHub API.6Accelerator: GPU7"""89"""10**KerasHub** is a pretrained modeling library that aims to be simple, flexible, and fast.11The library provides [Keras 3](https://keras.io/keras_3/) implementations of popular12model architectures, paired with a collection of pretrained checkpoints available on13[Kaggle](https://www.kaggle.com/organizations/keras/models). Models can be used for both14training and inference on any of the TensorFlow, Jax, and Torch backends.1516KerasHub is an extension of the core Keras API; KerasHub components are provided as17`keras.Layer`s and `keras.Model`s. If you are familiar with Keras, congratulations! You18already understand most of KerasHub.1920This guide is meant to be an accessible introduction to the entire library. We will start21by using high-level APIs to classify images and generate text, then progressively show22deeper customization of models and training. Throughout the guide, we use Professor Keras,23the official Keras mascot, as a visual reference for the complexity of the material:2425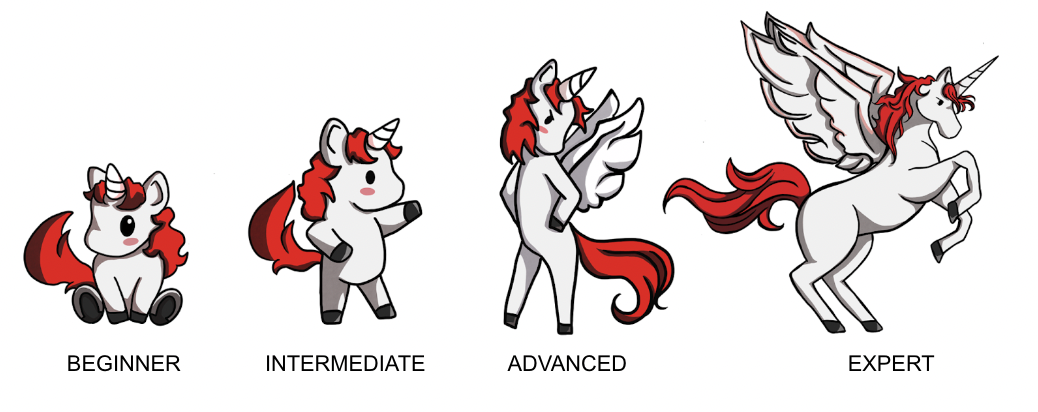2627As always, we'll keep our Keras guides focused on real-world code examples. You can play28with the code here at any time by clicking the Colab link at the top of the guide.29"""3031"""32## Installation and Setup33"""3435"""36To begin, let's install keras-hub. The library is available on PyPI, so we can simply37install it with pip.38"""3940"""shell41pip install --upgrade --quiet keras-hub keras42"""4344"""45Keras 3 was built to work on top of TensorFlow, Jax, and Torch backends. You should46specify the backend first thing when writing Keras code, before any library imports. We47will use the Jax backend for this guide, but you can use `torch` or `tensorflow` without48changing a single line in the rest of this guide. That's the power of Keras 3!4950We will also set `XLA_PYTHON_CLIENT_MEM_FRACTION`, which frees up the whole GPU for51Jax to use from the start.52"""5354import os5556os.environ["KERAS_BACKEND"] = "jax" # or "tensorflow" or "torch"57os.environ["XLA_PYTHON_CLIENT_MEM_FRACTION"] = "1.0"5859"""60Lastly, we need to do some extra setup to access the models used in this guide. Many61popular open LLMs, such as Gemma from Google and Llama from Meta, require accepting62a community license before accessing the model weights. We will be using Gemma in this63guide, so we can follow the following steps:64651. Go to the [Gemma 2](https://www.kaggle.com/models/keras/gemma2) model page, and accept66the license at the banner at the top.672. Generate an Kaggle API key by going to [Kaggle settings](https://www.kaggle.com/settings)68and clicking "Create New Token" button under the "API" section.693. Inside your colab notebook, click on the key icon on the left hand toolbar. Add two70secrets: `KAGGLE_USERNAME` with your username, and `KAGGLE_KEY` with the API key you just71created. Make these secrets visible to the notebook you are running.72"""7374"""75## API Quickstart7677Before we begin, let's take a look at the key classes we will use in the KerasHub library.7879* **Task**: e.g., `keras_hub.models.CausalLM`, `keras_hub.models.ImageClassifier`, and80`keras_hub.models.TextClassifier`.81* **What it does**: A task maps from raw image, audio, and text inputs to model82predictions.83* **Why it's important**: A task is the highest-level entry point to the KerasHub API. It84encapsulates both preprocessing and modeling into a single, easy-to-use class. Tasks can85be used both for fine-tuning and inference.86* **Has a**: `backbone` and `preprocessor`.87* **Inherits from**: `keras.Model`.88* **Backbone**: `keras_hub.models.Backbone`.89* **What it does**: Maps preprocessed tensor inputs to the latent space of the model.90* **Why it's important**: The backbone encapsulates the architecture and parameters of a91pretrained models in a way that is unspecialized to any particular task. A backbone can92be combined with arbitrary preprocessing and "head" layers mapping dense features to93predictions to accomplish any ML task.94* **Inherits from**: `keras.Model`.95* **Preprocessor**: e.g.,`keras_hub.models.CausalLMPreprocessor`,96`keras_hub.models.ImageClassifierPreprocessor`, and97`keras_hub.models.TextClassifierPreprocessor`.98* **What it does**: A preprocessor maps from raw image, audio and text inputs to99preprocessed tensor inputs.100* **Why it's important**: A preprocessing layer encapsulates all tasks specific101preprocessing, e.g. image resizing and text tokenization, in a way that can be used102standalone to precompute preprocessed inputs. Note that if you are using a high-level103task class, this preprocessing is already baked in by default.104* **Has a**: `tokenizer`, `audio_converter`, and/or `image_converter`.105* **Inherits from**: `keras.layers.Layer`.106* **Tokenizer**: `keras_hub.tokenizers.Tokenizer`.107* **What it does**: Converts strings to sequences of token ids.108* **Why it's important**: The raw bytes of a string are an inefficient representation of109text input, so we first map string inputs to integer token ids. This class encapsulated110the mapping of strings to ints and the reverse (via the `detokenize()` method).111* **Inherits from**: `keras.layers.Layer`.112* **ImageConverter**: `keras_hub.layers.ImageConverter`.113* **What it does**: Resizes and rescales image input.114* **Why it's important**: Image models often need to normalize image inputs to a specific115range, or resizing inputs to a specific size. This class encapsulates the image-specific116preprocessing.117* **Inherits from**: `keras.layers.Layer`.118* **AudioConveter**: `keras_hub.layers.AudioConveter`.119* **What it does**: Converts raw audio to model ready input.120* **Why it's important**: Audio models often need to preprocess raw audio input before121passing it to a model, e.g. by computing a spectrogram of the audio signal. This class122encapsulates the image specific preprocessing in an easy to use layer.123* **Inherits from**: `keras.layers.Layer`.124125All of the classes listed here have a `from_preset()` constructor, which will instantiate126the component with weights and state for the given pre-trained model identifier. E.g.127`keras_hub.tokenizers.Tokenizer.from_preset("gemma2_2b_en")` will create a layer that128tokenizes text using a Gemma2 tokenizer vocabulary.129130The figure below shows how all these core classes interact. Arrow indicate composition131not inheritance (e.g., a task *has a* backbone).132133134"""135136"""137## Classify an image138139140"""141142"""143Enough setup! Let's have some fun with pre-trained models. Let's load a test image of a144California Quail and classify it.145"""146147import keras148import numpy as np149import matplotlib.pyplot as plt150151image_url = "https://upload.wikimedia.org/wikipedia/commons/a/aa/California_quail.jpg"152image_path = keras.utils.get_file(origin=image_url)153image = keras.utils.load_img(image_path)154plt.imshow(image)155156"""157We can use a ResNet vision model trained on the ImageNet-1k database. This model will158give each input sample and output label from `[0, 1000)`, where each label corresponds to159some real word entity, like a "milk can" or a "porcupine." The dataset actually has a160specific label for quail, at index 85. Let's download the model and predict a label.161"""162163import keras_hub164165image_classifier = keras_hub.models.ImageClassifier.from_preset(166"resnet_50_imagenet",167activation="softmax",168)169batch = np.array([image])170image_classifier.preprocessor.image_size = (224, 224)171preds = image_classifier.predict(batch)172preds.shape173174"""175These ImageNet labels aren't a particularly "human readable," so we can use a built-in176utility function to decode the predictions to a set of class names.177"""178179keras_hub.utils.decode_imagenet_predictions(preds)180181"""182Looking good! The model weights successfully downloaded, and we predicted the183correct classification label for our quail image with near certainty.184185This was our first example of the high-level **task** API mentioned in the API quickstart186above. An `keras_hub.models.ImageClassifier` is a task for classifying images, and can be187used with a number of different model architectures (ResNet, VGG, MobileNet, etc). You188can view the full list of models shipped directly by the Keras team on189[Kaggle](https://www.kaggle.com/organizations/keras/models).190191A task is just a subclass of `keras.Model` — you can use `fit()`, `compile()`, and192`save()` on our `classifier` object same as any other model. But tasks come with a few193extras provided by the KerasHub library. The first and most important is `from_preset()`,194a special constructor you will see on many classes in KerasHub.195196A **preset** is a directory of model state. It defines both the architecture we should197load and the pretrained weights that go with it. `from_preset()` allows us to load198**preset** directories from a number of different locations:199200- A local directory.201- The Kaggle Model hub.202- The HuggingFace model hub.203204You can take a look at the `keras_hub.models.ImageClassifier.from_preset` docs to better205understand all the options when constructing a Keras model from a preset.206207All tasks use two main sub-objects. A `keras_hub.models.Backbone` and a208`keras_hub.layers.Preprocessor`. You might be familiar already with the term **backbone**209from computer vision, where it is often used to describe a feature extractor network that210maps images to a latent space. A KerasHub backbone is this concept generalized, we use it211to refer to any pretrained model without a task-specific head. That is, a KerasHub212backbone maps raw images, audio and text (or a combination of these inputs) to a213pretrained model's latent space. We can then map this latent space to any number of task214specific outputs, depending on what we are trying to do with the model.215216A **preprocessor** is just a Keras layer that does all the preprocessing for a specific217task. In our case, preprocessing with will resize our input image and rescale it to the218range `[0, 1]` using some ImageNet specific mean and variance data. Let's call our219task's preprocessor and backbone in succession to see what happens to our input shape.220"""221222print("Raw input shape:", batch.shape)223resized_batch = image_classifier.preprocessor(batch)224print("Preprocessed input shape:", resized_batch.shape)225hidden_states = image_classifier.backbone(resized_batch)226print("Latent space shape:", hidden_states.shape)227228"""229Our raw image is rescaled to `(224, 224)` during preprocessing and finally230downscaled to a `(7, 7)` image of 2048 feature vectors — the latent space of the231ResNet model. Note that ResNet can actually handle images of arbitrary sizes,232though performance will eventually fall off if your image is very different233sized than the pretrained data. If you'd like to disable the resizing in the234preprocessing layer, you can run `image_classifier.preprocessor.image_size = None`.235236If you are ever wondering the exact structure of the task you loaded, you can237use `model.summary()` same as any Keras model. The model summary for tasks will238included extra information on model preprocessing.239"""240241image_classifier.summary()242243"""244## Generate text with an LLM245246247"""248249"""250Next up, let's try working with and generating text. The task we can use when generating251text is `keras_hub.models.CausalLM` (where LM is short for **L**anguage **M**odel). Let's252download the 2 billion parameter Gemma 2 model and try it out.253254Since this is about 100x larger model than the ResNet model we just downloaded, we need to be255a little more careful about our GPU memory usage. We can use a half-precision type to256load each parameter of our ~2.5 billion as a two-byte float instead of four. To do this257we can pass `dtype` to the `from_preset()` constructor. `from_preset()` will forward any258kwargs to the main constructor for the class, so you can pass kwargs that work on all259Keras layers like `dtype`, `trainable`, and `name`.260"""261262causal_lm = keras_hub.models.CausalLM.from_preset(263"gemma2_instruct_2b_en",264dtype="bfloat16",265)266267"""268The model we just loaded was an instruction-tuned version of Gemma, which means the model269was further fine-tuned for chat. We can take advantage of these capabilities as long as270we stick to the particular template for text used when training the model. These special271tokens vary per model and can be hard to track, the [Kaggle model272page](https://www.kaggle.com/models/keras/gemma2/) will contain details such as this.273274`CausalLM` comes with an extra function called `generate()` which can be used generate275predicted tokens in a loop and decode them as a string.276"""277278template = "<start_of_turn>user\n{question}<end_of_turn>\n<start_of_turn>model"279280question = """Write a python program to generate the first 1000 prime numbers.281Just show the actual code."""282print(causal_lm.generate(template.format(question=question), max_length=512))283284"""285Note that on the Jax and TensorFlow backends, this `generate()` function is compiled, so286the second time you call for the same `max_length`, it will actually be much faster.287KerasHub will use Jax and TensorFlow to compute an optimized version of the generation288computational graph that can be reused.289"""290291question = "Share a very simple brownie recipe."292print(causal_lm.generate(template.format(question=question), max_length=512))293294"""295As with our image classifier, we can use model summary to see the details of our task296setup, including preprocessing.297"""298299causal_lm.summary()300301"""302Our text preprocessing includes a tokenizer, which is how all KerasHub models handle303input text. Let's try using it directly to get a better sense of how it works. All304tokenizers include `tokenize()` and `detokenize()` methods, to map strings to integer305sequences and integer sequences to strings. Directly calling the layer with306`tokenizer(inputs)` is equivalent to calling `tokenizer.tokenize(inputs)`.307"""308309tokenizer = causal_lm.preprocessor.tokenizer310tokens_ids = tokenizer.tokenize("The quick brown fox jumps over the lazy dog.")311print(tokens_ids)312string = tokenizer.detokenize(tokens_ids)313print(string)314315"""316The `generate()` function for `CausalLM` models involved a sampling step. The Gemma model317will be called once for each token we want to generate, and return a probability318distribution over all tokens. This distribution is then sampled to choose the next token319in the sequence.320321For Gemma models, we default to greedy sampling, meaning we simply pick the most likely322output from the model at each step. But we can actually control this process with an323extra `sampler` argument to the standard `compile` function on all Keras models. Let's324try it out.325"""326327causal_lm.compile(328sampler=keras_hub.samplers.TopKSampler(k=10, temperature=2.0),329)330331question = "Share a very simple brownie recipe."332print(causal_lm.generate(template.format(question=question), max_length=512))333334"""335Here we used a Top-K sampler, meaning we will randomly sample the partial distribution formed336by looking at just the top 10 predicted tokens at each time step. We also pass a `temperature` of 2,337which flattens our predicted distribution before we sample.338339The net effect is that we will explore our model's distribution much more broadly each340time we generate output. Generation will now be a random process, each time we re-run341generate we will get a different result. We can note that the results feel "looser" than342greedy search — more minor mistakes and a less consistent tone.343344You can look at all the samplers Keras supports at [keras_hub.samplers](https://keras.io/api/keras_hub/samplers/).345346Let's free up the memory from our large Gemma model before we jump to the next section.347"""348349del causal_lm350351"""352## Fine-tune and publish an image classifier353354355"""356357"""358Now that we've tried running inference for both images and text, let's try running359training. We will take our ResNet image classifier from earlier and fine-tune it on360simple cats vs dogs dataset. We can start by downloading and extracting the data.361"""362363import pathlib364365extract_dir = keras.utils.get_file(366"cats_vs_dogs",367"https://download.microsoft.com/download/3/E/1/3E1C3F21-ECDB-4869-8368-6DEBA77B919F/kagglecatsanddogs_5340.zip",368extract=True,369)370data_dir = pathlib.Path(extract_dir) / "PetImages"371372"""373When working with lots of real-world image data, corrupted images are a common occurrence.374Let's filter out badly-encoded images that do not feature the string "JFIF" in their375header.376"""377378num_skipped = 0379380for path in data_dir.rglob("*.jpg"):381with open(path, "rb") as file:382is_jfif = b"JFIF" in file.peek(10)383if not is_jfif:384num_skipped += 1385os.remove(path)386387print(f"Deleted {num_skipped} images.")388389"""390We can load the dataset with `keras.utils.image_dataset_from_directory`. One important391thing to note here is that the `train_ds` and `val_ds` will both be returned as392`tf.data.Dataset` objects, including on the `torch` and `jax` backends.393394KerasHub will use [tf.data](https://www.tensorflow.org/guide/data) as the default API for395running multi-threaded preprocessing on the CPU. `tf.data` is a powerful API for training396input pipelines that can scale up to complex, multi-host training jobs easily. Using it397does not restrict your choice of backend, a `tf.data.Dataset` can be as an iterator of398regular numpy data and passed to `fit()` on any Keras backend.399"""400401train_ds, val_ds = keras.utils.image_dataset_from_directory(402data_dir,403validation_split=0.2,404subset="both",405seed=1337,406image_size=(256, 256),407batch_size=32,408)409410"""411At its simplest, training our classifier could consist of simply calling `fit()` on our412model with our dataset. But to make this example a little more interesting, let's show413how to customize preprocessing within a task.414415In the first example, we saw how, by default, the preprocessing for our ResNet model resized416and rescaled our input. This preprocessing can be customized when we create our model. We417can use Keras' image preprocessing layers to create a `keras.layers.Pipeline` that will418rescale, randomly flip, and randomly rotate our input images. These random image419augmentations will allow our smaller dataset to function as a larger, more varied one.420Let's try it out.421"""422423preprocessor = keras.layers.Pipeline(424[425keras.layers.Rescaling(1.0 / 255),426keras.layers.RandomFlip("horizontal"),427keras.layers.RandomRotation(0.2),428]429)430431"""432Now that we have created a new layer for preprocessing, we can simply pass it to the433`ImageClassifier` during the `from_preset()` constructor. We can also pass434`num_classes=2` to match our two labels for "cat" and "dog." When `num_classes` is435specified like this, our head weights for the model will be randomly initialized436instead of containing the weights for our 1000 class image classification.437"""438439image_classifier = keras_hub.models.ImageClassifier.from_preset(440"resnet_50_imagenet",441activation="softmax",442num_classes=2,443preprocessor=preprocessor,444)445446"""447Note that if you want to preprocess your input data outside of Keras, you can simply448pass `preprocessor=None` to the task `from_preset()` call. In this case, KerasHub will449apply no preprocessing at all, and you are free to preprocess your data with any library450or workflow before passing your data to `fit()`.451452Next, we can compile our model for fine-tuning. A KerasHub task is just a regular453`keras.Model` with some extra functionality, so we can `compile()` as normal for a454classification task.455"""456457image_classifier.compile(458optimizer=keras.optimizers.Adam(1e-4),459loss="sparse_categorical_crossentropy",460metrics=["accuracy"],461)462463"""464With that, we can simply run `fit()`. The image classifier will automatically apply our465preprocessing to each batch when training the model.466"""467468image_classifier.fit(469train_ds,470validation_data=val_ds,471epochs=3,472)473474"""475After three epochs of data, we achieve 99% accuracy on our cats vs dogs476validation dataset. This is unsurprising, given that the ImageNet pretrained weights we began477with could already classify some breeds of cats and dogs individually.478479Now that we have a fine-tuned model let's try saving it. You can create a new saved preset with a480fine-tuned model for any task simply by running `task.save_to_preset()`.481"""482483image_classifier.save_to_preset("cats_vs_dogs")484485"""486One of the most powerful features of KerasHub is the ability upload models to Kaggle or487Huggingface models hub and share them with others. `keras_hub.upload_preset` allows you488to upload a saved preset.489490In this case, we will upload to Kaggle. We have already authenticated with Kaggle to,491download the Gemma model earlier. Running the following cell well upload a new model492to Kaggle.493"""494495from google.colab import userdata496497username = userdata.get("KAGGLE_USERNAME")498keras_hub.upload_preset(499f"kaggle://{username}/resnet/keras/cats_vs_dogs",500"cats_vs_dogs",501)502503"""504Let's take a look at a test image from our dataset.505"""506507image = keras.utils.load_img(data_dir / "Cat" / "6779.jpg")508plt.imshow(image)509510"""511If we wait for a few minutes for our model upload to finish processing on the Kaggle512side, we can go ahead and download the model we just created and use it to classify this513test image.514"""515516image_classifier = keras_hub.models.ImageClassifier.from_preset(517f"kaggle://{username}/resnet/keras/cats_vs_dogs",518)519print(image_classifier.predict(np.array([image])))520521"""522Congratulations on uploading your first model with KerasHub! If you want to share your523work with others, you can go to the model link printed out when we uploaded the model, and524turn the model public in settings.525526Let's delete this model to free up memory before we move on to our final example for this527guide.528"""529530del image_classifier531532"""533## Building a custom text classifier534535536"""537538"""539As a final example for this getting started guide, let's take a look at how we can build540custom models from lower-level Keras and KerasHub components. We will build a text541classifier to classify movie reviews in the IMDb dataset as either positive or negative.542543Let's download the dataset.544"""545546extract_dir = keras.utils.get_file(547"imdb_reviews",548origin="https://ai.stanford.edu/~amaas/data/sentiment/aclImdb_v1.tar.gz",549extract=True,550)551data_dir = pathlib.Path(extract_dir) / "aclImdb"552553"""554The IMDb dataset contrains a large amount of unlabeled movie reviews. We don't need those555here, we can simply delete them.556"""557558import shutil559560shutil.rmtree(data_dir / "train" / "unsup")561562"""563Next up, we can load our data with `keras.utils.text_dataset_from_directory`. As with our564image dataset creation above, the returned datasets will be `tf.data.Dataset` objects.565"""566567raw_train_ds = keras.utils.text_dataset_from_directory(568data_dir / "train",569batch_size=2,570)571raw_val_ds = keras.utils.text_dataset_from_directory(572data_dir / "test",573batch_size=2,574)575576"""577KerasHub is designed to be a layered API. At the top-most level, tasks aim to make it578easy to quickly tackle a problem. We could keep using the task API here, and create a579`keras_hub.models.TextClassifer` for a text classification model like BERT, and fine-tune580it in 10 or so lines of code.581582Instead, to make our final example a little more interesting, let's show how we can use583lower-level API components to do something that isn't directly baked in to the library.584We will take the Gemma 2 model we used earlier, which is usually used for generating text,585and modify it to output classification predictions.586587A common approach for classifying with a generative model would keep using it in a generative588context, by prompting it with the review and a question (`"Is this review positive or negative?"`).589But making an actual classifier is more useful if you want an actual probability score associated590with your labels.591592Instead of loading the Gemma 2 model through the `CausalLM` task, we can load two593lower-level components: a **backbone** and a **tokenizer**. Much like the task classes we have594used so far, `keras_hub.models.Backbone` and `keras_hub.tokenizers.Tokenizer` both have a595`from_preset()` constructor for loading pretrained models. If you are running this code,596you will note you don't have to wait for a download as we use the model a second time,597the weights files are cached locally the first time we use the model.598"""599600tokenizer = keras_hub.tokenizers.Tokenizer.from_preset(601"gemma2_instruct_2b_en",602)603backbone = keras_hub.models.Backbone.from_preset(604"gemma2_instruct_2b_en",605)606607"""608We saw what the tokenizer does in the second example of this guide. We can use it to map609from string inputs to token ids in a way that matches the pretrained weights of the Gemma610model.611612The backbone will map from a sequence of token ids to a sequence of embedded tokens in613the latent space of the model. We can use this rich representation to build a classifier.614615Let's start by defining a custom preprocessing routine. `keras_hub.layers` contains a616collection of modeling and preprocessing layers, included some layers for token617preprocessing. We can use `keras_hub.layers.StartEndPacker`, which will append a special618start token to the beginning of each review, a special end token to the end, and finally619truncate or pad each review to a fixed length.620621If we combine this with our `tokenizer`, we can build a preprocessing function that will622output batches of token ids with shape `(batch_size, sequence_length)`. We should also623output a padding mask that marks which tokens are padding tokens, so we can later exclude624these positions from our Transformer's attention computation. Most Transformer backbones625in KerasNLP take in a `"padding_mask"` input.626"""627628packer = keras_hub.layers.StartEndPacker(629start_value=tokenizer.start_token_id,630end_value=tokenizer.end_token_id,631pad_value=tokenizer.pad_token_id,632sequence_length=None,633)634635636def preprocess(x, y=None, sequence_length=256):637x = tokenizer(x)638x = packer(x, sequence_length=sequence_length)639x = {640"token_ids": x,641"padding_mask": x != tokenizer.pad_token_id,642}643return keras.utils.pack_x_y_sample_weight(x, y)644645646"""647With our preprocessing defined, we can simply use `tf.data.Dataset.map` to apply our648preprocessing to our input data.649"""650651train_ds = raw_train_ds.map(preprocess, num_parallel_calls=16)652val_ds = raw_val_ds.map(preprocess, num_parallel_calls=16)653next(iter(train_ds))654655"""656Running fine-tuning on a 2.5 billion parameter model is quite expensive compared to the657image classifier we trained earlier, for the simple reason that this model is 100x the658size of ResNet! To speed things up a bit, let's reduce the size of our training data to a659tenth of the original size. Of course, this is leaving some performance on the table660compared to full training, but it will keep things running quickly for our guide.661"""662663train_ds = train_ds.take(1000)664val_ds = val_ds.take(1000)665666"""667Next, we need to attach a classification head to our backbone model. In general, text668transformer backbones will output a tensor with shape669`(batch_size, sequence_length, hidden_dim)`. The main thing we will need to670classify with this input is to pool on the sequence dimension so we have a single671feature vector per input example.672673Since the Gemma model is a generative model, information only passed from left to right674in the sequence. The only token representation that can "see" the entire movie review675input is the final token in each review. We can write a simple pooling layer to do this —676we will simply grab the last non-padding position of each input sequence. There's no special677process to writing a layer like this, we can use Keras and `keras.ops` normally.678"""679680from keras import ops681682683class LastTokenPooler(keras.layers.Layer):684def call(self, inputs, padding_mask):685end_positions = ops.sum(padding_mask, axis=1, keepdims=True) - 1686end_positions = ops.cast(end_positions, "int")[:, :, None]687outputs = ops.take_along_axis(inputs, end_positions, axis=1)688return ops.squeeze(outputs, axis=1)689690691"""692With this pooling layer, we are ready to write our Gemma classifier. All task and backbone693models in KerasHub are [functional](https://keras.io/guides/functional_api/) models, so694we can easily manipulate the model structure. We will call our backbone on our inputs, add695our new pooling layer, and finally add a small feedforward network with a `"relu"` activation696in the middle. Let's try it out.697"""698699inputs = backbone.input700x = backbone(inputs)701x = LastTokenPooler(702name="pooler",703)(x, inputs["padding_mask"])704x = keras.layers.Dense(7052048,706activation="relu",707name="pooled_dense",708)(x)709x = keras.layers.Dropout(7100.1,711name="output_dropout",712)(x)713outputs = keras.layers.Dense(7142,715activation="softmax",716name="output_dense",717)(x)718text_classifier = keras.Model(inputs, outputs)719text_classifier.summary()720721"""722Before we train, there is one last trick we should employ to make this code run on free723tier colab GPUs. We can see from our model summary our model takes up almost 10 gigabytes724of space. An optimizer will need to make multiple copies of each parameter during725training, taking the total space of our model during training close to 30 or 40726gigabytes.727728This would OOM many GPUs. A useful trick we can employ is to enable LoRA on our729backbone. LoRA is an approach which freezes the entire model, and only trains a low-parameter730decomposition of large weight matrices. You can read more about LoRA in this [Keras731example](https://keras.io/examples/nlp/parameter_efficient_finetuning_of_gpt2_with_lora/).732Let's try enabling it and re-printing our summary.733"""734735backbone.enable_lora(4)736text_classifier.summary()737738"""739After enabling LoRA, our model goes from 10GB of traininable parameters to just 20MB.740That means the space used by optimizer variables will no longer be a concern.741742With all that set up, we can compile and train our model as normal.743"""744745text_classifier.compile(746optimizer=keras.optimizers.Adam(5e-5),747loss="sparse_categorical_crossentropy",748metrics=["accuracy"],749)750text_classifier.fit(751train_ds,752validation_data=val_ds,753)754755"""756We are able to achieve over ~93% accuracy on the movie review sentiment757classification problem. This is not bad, given that we only used a 10th of our758original dataset to train.759760Taken together, the `backbone` and `tokenizer` we created in this example761allowed us access the full power of pretrained Gemma checkpoints, without762restricting what we could do with them. This is a central aim of the KerasHub763API. Simple workflows should be easy, and as you go deeper, you gain access to a764deeply customizable set of building blocks.765"""766767"""768## Going further769770This is just scratching the surface of what you can do with the KerasHub.771772This guide shows a few of the high-level tasks that we ship with the KerasHub library,773but there are many tasks we did not cover here. Try [generating images with Stable774Diffusion](https://keras.io/guides/keras_hub/stable_diffusion_3_in_keras_hub/), for775example.776777The most significant advantage of KerasHub is it gives you the flexibility to combine pre-trained778building blocks with the full power of Keras 3. You can train large LLMs on TPUs with model779parallelism with the [keras.distribution](https://keras.io/guides/distribution/) API. You can780quantize models with Keras' [quatize781method](https://keras.io/examples/keras_recipes/float8_training_and_inference_with_transfo782rmer/). You can write custom training loops and even mix in direct Jax, Torch, or783Tensorflow calls.784785See [keras.io/keras_hub](https://keras.io/keras_hub/) for a full list of guides and786examples to continue digging into the library.787"""788789790