
Path: blob/master/guides/md/keras_hub/getting_started.md
8325 views
Getting Started with KerasHub
Author: Matthew Watson, Jonathan Bischof
Date created: 2022/12/15
Last modified: 2024/10/17
Description: An introduction to the KerasHub API.

KerasHub is a pretrained modeling library that aims to be simple, flexible, and fast. The library provides Keras 3 implementations of popular model architectures, paired with a collection of pretrained checkpoints available on Kaggle. Models can be used for both training and inference on any of the TensorFlow, Jax, and Torch backends.
KerasHub is an extension of the core Keras API; KerasHub components are provided as keras.Layers and keras.Models. If you are familiar with Keras, congratulations! You already understand most of KerasHub.
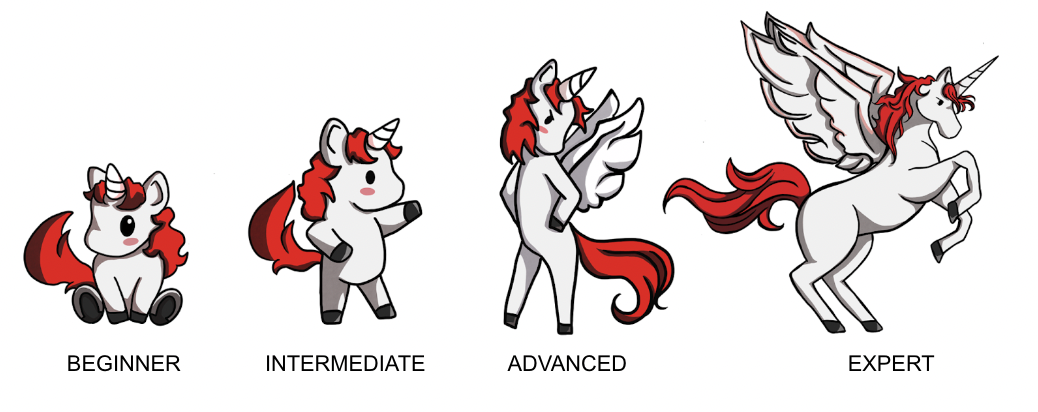
This guide is meant to be an accessible introduction to the entire library. We will start by using high-level APIs to classify images and generate text, then progressively show deeper customization of models and training. Throughout the guide, we use Professor Keras, the official Keras mascot, as a visual reference for the complexity of the material:
As always, we'll keep our Keras guides focused on real-world code examples. You can play with the code here at any time by clicking the Colab link at the top of the guide.
Installation and Setup
To begin, let's install keras-hub. The library is available on PyPI, so we can simply install it with pip.
Keras 3 was built to work on top of TensorFlow, Jax, and Torch backends. You should specify the backend first thing when writing Keras code, before any library imports. We will use the Jax backend for this guide, but you can use torch or tensorflow without changing a single line in the rest of this guide. That's the power of Keras 3!
We will also set XLA_PYTHON_CLIENT_MEM_FRACTION, which frees up the whole GPU for Jax to use from the start.
Lastly, we need to do some extra setup to access the models used in this guide. Many popular open LLMs, such as Gemma from Google and Llama from Meta, require accepting a community license before accessing the model weights. We will be using Gemma in this guide, so we can follow the following steps:
Go to the Gemma 2 model page, and accept the license at the banner at the top.
Generate an Kaggle API key by going to Kaggle settings and clicking "Create New Token" button under the "API" section.
Inside your colab notebook, click on the key icon on the left hand toolbar. Add two secrets:
KAGGLE_USERNAMEwith your username, andKAGGLE_KEYwith the API key you just created. Make these secrets visible to the notebook you are running.
API Quickstart
Before we begin, let's take a look at the key classes we will use in the KerasHub library.
Task: e.g.,
keras_hub.models.CausalLM,keras_hub.models.ImageClassifier, andkeras_hub.models.TextClassifier.What it does: A task maps from raw image, audio, and text inputs to model predictions.
Why it's important: A task is the highest-level entry point to the KerasHub API. It encapsulates both preprocessing and modeling into a single, easy-to-use class. Tasks can be used both for fine-tuning and inference.
Has a:
backboneandpreprocessor.Inherits from:
keras.Model.
Backbone:
keras_hub.models.Backbone.What it does: Maps preprocessed tensor inputs to the latent space of the model.
Why it's important: The backbone encapsulates the architecture and parameters of a pretrained models in a way that is unspecialized to any particular task. A backbone can be combined with arbitrary preprocessing and "head" layers mapping dense features to predictions to accomplish any ML task.
Inherits from:
keras.Model.
Preprocessor: e.g.,
keras_hub.models.CausalLMPreprocessor,keras_hub.models.ImageClassifierPreprocessor, andkeras_hub.models.TextClassifierPreprocessor.What it does: A preprocessor maps from raw image, audio and text inputs to preprocessed tensor inputs.
Why it's important: A preprocessing layer encapsulates all tasks specific preprocessing, e.g. image resizing and text tokenization, in a way that can be used standalone to precompute preprocessed inputs. Note that if you are using a high-level task class, this preprocessing is already baked in by default.
Has a:
tokenizer,audio_converter, and/orimage_converter.Inherits from:
keras.layers.Layer.
Tokenizer:
keras_hub.tokenizers.Tokenizer.What it does: Converts strings to sequences of token ids.
Why it's important: The raw bytes of a string are an inefficient representation of text input, so we first map string inputs to integer token ids. This class encapsulated the mapping of strings to ints and the reverse (via the
detokenize()method).Inherits from:
keras.layers.Layer.
ImageConverter:
keras_hub.layers.ImageConverter.What it does: Resizes and rescales image input.
Why it's important: Image models often need to normalize image inputs to a specific range, or resizing inputs to a specific size. This class encapsulates the image-specific preprocessing.
Inherits from:
keras.layers.Layer.
AudioConveter:
keras_hub.layers.AudioConveter.What it does: Converts raw audio to model ready input.
Why it's important: Audio models often need to preprocess raw audio input before passing it to a model, e.g. by computing a spectrogram of the audio signal. This class encapsulates the image specific preprocessing in an easy to use layer.
Inherits from:
keras.layers.Layer.
All of the classes listed here have a from_preset() constructor, which will instantiate the component with weights and state for the given pre-trained model identifier. E.g. keras_hub.tokenizers.Tokenizer.from_preset("gemma2_2b_en") will create a layer that tokenizes text using a Gemma2 tokenizer vocabulary.
The figure below shows how all these core classes interact. Arrow indicate composition not inheritance (e.g., a task has a backbone).

Classify an image

Enough setup! Let's have some fun with pre-trained models. Let's load a test image of a California Quail and classify it.

We can use a ResNet vision model trained on the ImageNet-1k database. This model will give each input sample and output label from [0, 1000), where each label corresponds to some real word entity, like a "milk can" or a "porcupine." The dataset actually has a specific label for quail, at index 85. Let's download the model and predict a label.
Preprocessed input shape: (1, 224, 224, 3)
Latent space shape: (1, 7, 7, 2048)
Preprocessor: "res_net_image_classifier_preprocessor"
┏━━━━━━━━━━━━━━━━━━━━━━━━━━━━━━━━━━━━━━━━━━━━━━┳━━━━━━━━━━━━━━━━━━━━━━━━━━━━━━━┓
┃ Layer (type)                                 ┃                        Config ┃
┡━━━━━━━━━━━━━━━━━━━━━━━━━━━━━━━━━━━━━━━━━━━━━━╇━━━━━━━━━━━━━━━━━━━━━━━━━━━━━━━┩
│ res_net_image_converter                      │        Image size: (224, 224) │
│ (ResNetImageConverter)                       │                               │
└──────────────────────────────────────────────┴───────────────────────────────┘
Model: "res_net_image_classifier"
┏━━━━━━━━━━━━━━━━━━━━━━━━━━━━━━━━━━━┳━━━━━━━━━━━━━━━━━━━━━━━━━━┳━━━━━━━━━━━━━━━┓
┃ Layer (type)                      ┃ Output Shape             ┃       Param # ┃
┡━━━━━━━━━━━━━━━━━━━━━━━━━━━━━━━━━━━╇━━━━━━━━━━━━━━━━━━━━━━━━━━╇━━━━━━━━━━━━━━━┩
│ input_layer (InputLayer)          │ (None, None, None, 3)    │             0 │
├───────────────────────────────────┼──────────────────────────┼───────────────┤
│ res_net_backbone (ResNetBackbone) │ (None, None, None, 2048) │    23,561,152 │
├───────────────────────────────────┼──────────────────────────┼───────────────┤
│ pooler (GlobalAveragePooling2D)   │ (None, 2048)             │             0 │
├───────────────────────────────────┼──────────────────────────┼───────────────┤
│ output_dropout (Dropout)          │ (None, 2048)             │             0 │
├───────────────────────────────────┼──────────────────────────┼───────────────┤
│ predictions (Dense)               │ (None, 1000)             │     2,049,000 │
└───────────────────────────────────┴──────────────────────────┴───────────────┘
Total params: 25,610,152 (97.69 MB)
Trainable params: 25,557,032 (97.49 MB)
Non-trainable params: 53,120 (207.50 KB)
Generate text with an LLM

Next up, let's try working with and generating text. The task we can use when generating text is keras_hub.models.CausalLM (where LM is short for Language Model). Let's download the 2 billion parameter Gemma 2 model and try it out.
Since this is about 100x larger model than the ResNet model we just downloaded, we need to be a little more careful about our GPU memory usage. We can use a half-precision type to load each parameter of our ~2.5 billion as a two-byte float instead of four. To do this we can pass dtype to the from_preset() constructor. from_preset() will forward any kwargs to the main constructor for the class, so you can pass kwargs that work on all Keras layers like dtype, trainable, and name.
The model we just loaded was an instruction-tuned version of Gemma, which means the model was further fine-tuned for chat. We can take advantage of these capabilities as long as we stick to the particular template for text used when training the model. These special tokens vary per model and can be hard to track, the Kaggle model page will contain details such as this.
CausalLM come with an extra function called generate() which can be used generate predict tokens in a loop and decode them as a string.
count = 0 number = 2 primes = [] while count < 1000: if is_prime(number): primes.append(number) count += 1 number += 1 print(primes) <end_of_turn>
Super Simple Brownies
Ingredients:
1 cup (2 sticks) unsalted butter, melted
2 cups granulated sugar
4 large eggs
1 teaspoon vanilla extract
1 cup all-purpose flour
1/2 cup unsweetened cocoa powder
1/4 teaspoon salt
Instructions:
Preheat oven to 350°F (175°C). Grease and flour a 9x13 inch baking pan.
In a large bowl, whisk together the melted butter and sugar until smooth.
Beat in the eggs one at a time, then stir in the vanilla extract.
In a separate bowl, whisk together the flour, cocoa powder, and salt.
Gradually add the dry ingredients to the wet ingredients, mixing until just combined. Do not overmix.
Pour the batter into the prepared pan and spread evenly.
Bake for 25-30 minutes, or until a toothpick inserted into the center comes out with a few moist crumbs attached.
Let cool completely before cutting and serving.
Tips:
For extra fudgy brownies, underbake them slightly.
Add chocolate chips, nuts, or other mix-ins to the batter for a personalized touch.
Serve with a scoop of ice cream or whipped cream for a decadent treat.
Enjoy! <end_of_turn>
Preprocessor: "gemma_causal_lm_preprocessor"
┏━━━━━━━━━━━━━━━━━━━━━━━━━━━━━━━━━━━━━━━━━━━━━━┳━━━━━━━━━━━━━━━━━━━━━━━━━━━━━━━┓
┃ Layer (type)                                 ┃                        Config ┃
┡━━━━━━━━━━━━━━━━━━━━━━━━━━━━━━━━━━━━━━━━━━━━━━╇━━━━━━━━━━━━━━━━━━━━━━━━━━━━━━━┩
│ gemma_tokenizer (GemmaTokenizer)             │           Vocab size: 256,000 │
└──────────────────────────────────────────────┴───────────────────────────────┘
Model: "gemma_causal_lm"
┏━━━━━━━━━━━━━━━━━━━━━━━┳━━━━━━━━━━━━━━━━━━━┳━━━━━━━━━━━━━┳━━━━━━━━━━━━━━━━━━━━┓
┃ Layer (type)          ┃ Output Shape      ┃     Param # ┃ Connected to       ┃
┡━━━━━━━━━━━━━━━━━━━━━━━╇━━━━━━━━━━━━━━━━━━━╇━━━━━━━━━━━━━╇━━━━━━━━━━━━━━━━━━━━┩
│ padding_mask          │ (None, None)      │           0 │ -                  │
│ (InputLayer)          │                   │             │                    │
├───────────────────────┼───────────────────┼─────────────┼────────────────────┤
│ token_ids             │ (None, None)      │           0 │ -                  │
│ (InputLayer)          │                   │             │                    │
├───────────────────────┼───────────────────┼─────────────┼────────────────────┤
│ gemma_backbone        │ (None, None,      │ 2,614,341,… │ padding_mask[0][0… │
│ (GemmaBackbone)       │ 2304)             │             │ token_ids[0][0]    │
├───────────────────────┼───────────────────┼─────────────┼────────────────────┤
│ token_embedding       │ (None, None,      │ 589,824,000 │ gemma_backbone[0]… │
│ (ReversibleEmbedding) │ 256000)           │             │                    │
└───────────────────────┴───────────────────┴─────────────┴────────────────────┘
Total params: 2,614,341,888 (4.87 GB)
Trainable params: 2,614,341,888 (4.87 GB)
Non-trainable params: 0 (0.00 B)
Our text preprocessing includes a tokenizer, which is how all KerasHub models handle input text. Let's try using it directly to get a better sense of how it works. All tokenizers include tokenize() and detokenize() methods, to map strings to integer sequences and integer sequences to strings. Directly calling the layer with tokenizer(inputs) is equivalent to calling tokenizer.tokenize(inputs).
This recipe requires NO oven or special equipment! Just microwave, mixing, and a few moments!
Yields: 6 large brownies Prep time: 7 minutes Cook time: 6-9 minutes, depending on your microwave
What you need:
3 ounces (about 2-3 tablespoons) chocolate chips
1/4 cup butter
1 large egg
1/2 cup granulated sugar
9 tablespoons all-purpose flour
Optional Add-Ins (for extra fun):
1/2 teaspoon vanilla
1/4 cup chopped walnuts or pecans
Instructions:
Place all microwave-safe mixing bowl ingredients:
Chocolate Chips 🍫
Butter 🧈
Flour 🗲
Egg (beaten!) (You can add the optional add-INS like chopped nuts/extra vanilla, now is the good place to!)
Put all that in your microwave (microwave-safe dish or a heat-safe mug is fine!)
Cook on: Medium-high, stirring halfway.
Time depends on your microwave, so keep checking, but aim for 6-9 minutes (if no stirring at least 8 mins). You want a thick, almost chewy-texture.
To serve: Cut up your brownies immediately and savor this classic treat. You'd also need a tall glass of cold milk or coffee (or both, if you've really enjoyed it).
Let me know if you want to experiment with a different chocolate or add-ins to make it even sweeter. Enjoy! 😉
<end_of_turn>
Fine-tune and publish an image classifier

Now that we've tried running inference for both images and text, let's try running training. We will take our ResNet image classifier from earlier and fine-tune it on simple cats vs dogs dataset. We can start by downloading and extracting the data.
When working with lots of real-world image data, corrupted images are a common occurrence. Let's filter out badly-encoded images that do not feature the string "JFIF" in their header.
Using 18728 files for training.
Using 4682 files for validation.
Now that we have created a new layer for preprocessing, we can simply pass it to the ImageClassifier during the from_preset() constructor. We can also pass num_classes=2 to match our two labels for "cat" and "dog." When num_classes is specified like this, our head weights for the model will be randomly initialized instead of containing the weights for our 1000 class image classification.
Note that if you want to preprocess your input data outside of Keras, you can simply pass preprocessor=None to the task from_preset() call. In this case, KerasHub will apply no preprocessing at all, and you are free to preprocess your data with any library or workflow before passing your data to fit().
Next, we can compile our model for fine-tuning. A KerasHub task is just a regular keras.Model with some extra functionality, so we can compile() as normal for a classification task.
With that, we can simply run fit(). The image classifier will automatically apply our preprocessing to each batch when training the model.
<keras.src.callbacks.history.History at 0x787e77fb2550>
One of the most powerful features of KerasHub is the ability upload models to Kaggle or Huggingface models hub and share them with others. keras_hub.upload_preset allows you to upload a saved preset.
In this case, we will upload to Kaggle. We have already authenticated with Kaggle to, download the Gemma model earlier. Running the following cell well upload a new model to Kaggle.
Your model instance version has been created. Files are being processed... See at: https://www.kaggle.com/models/matthewdwatson/resnet/keras/cats_vs_dogs

If we wait for a few minutes for our model upload to finish processing on the Kaggle side, we can go ahead and download the model we just created and use it to classify this test image.
[[9.999286e-01 7.135461e-05]]
Building a custom text classifier

As a final example for this getting started guide, let's take a look at how we can build custom models from lower-level Keras and KerasHub components. We will build a text classifier to classify movie reviews in the IMDb dataset as either positive or negative.
Let's download the dataset.
The IMDb dataset contrains a large amount of unlabeled movie reviews. We don't need those here, we can simply delete them.
Next up, we can load our data with keras.utils.text_dataset_from_directory. As with our image dataset creation above, the returned datasets will be tf.data.Dataset objects.
Found 25000 files belonging to 2 classes.
We saw what the tokenizer does in the second example of this guide. We can use it to map from string inputs to token ids in a way that matches the pretrained weights of the Gemma model.
The backbone will map from a sequence of token ids to a sequence of embedded tokens in the latent space of the model. We can use this rich representation to build a classifier.
Let's start by defining a custom preprocessing routine. keras_hub.layers contains a collection of modeling and preprocessing layers, included some layers for token preprocessing. We can use keras_hub.layers.StartEndPacker, which will append a special start token to the beginning of each review, a special end token to the end, and finally truncate or pad each review to a fixed length.
If we combine this with our tokenizer, we can build a preprocessing function that will output batches of token ids with shape (batch_size, sequence_length). We should also output a padding mask that marks which tokens are padding tokens, so we can later exclude these positions from our Transformer's attention computation. Most Transformer backbones in KerasNLP take in a "padding_mask" input.
With our preprocessing defined, we can simply use tf.data.Dataset.map to apply our preprocessing to our input data.
Next, we need to attach a classification head to our backbone model. In general, text transformer backbones will output a tensor with shape (batch_size, sequence_length, hidden_dim). The main thing we will need to classify with this input is to pool on the sequence dimension so we have a single feature vector per input example.
Since the Gemma model is a generative model, information only passed from left to right in the sequence. The only token representation that can "see" the entire movie review input is the final token in each review. We can write a simple pooling layer to do this — we will simply grab the last non-padding position of each input sequence. There's no special process to writing a layer like this, we can use Keras and keras.ops normally.
With this pooling layer, we are ready to write our Gemma classifier. All task and backbone models in KerasHub are functional models, so we can easily manipulate the model structure. We will call our backbone on our inputs, add our new pooling layer, and finally add a small feedforward network with a "relu" activation in the middle. Let's try it out.
Model: "functional"
┏━━━━━━━━━━━━━━━━━━━━━┳━━━━━━━━━━━━━━━━━━━┳━━━━━━━━━━━━┳━━━━━━━━━━━━━━━━━━━┓
┃ Layer (type)        ┃ Output Shape      ┃    Param # ┃ Connected to      ┃
┡━━━━━━━━━━━━━━━━━━━━━╇━━━━━━━━━━━━━━━━━━━╇━━━━━━━━━━━━╇━━━━━━━━━━━━━━━━━━━┩
│ padding_mask        │ (None, None)      │          0 │ -                 │
│ (InputLayer)        │                   │            │                   │
├─────────────────────┼───────────────────┼────────────┼───────────────────┤
│ token_ids           │ (None, None)      │          0 │ -                 │
│ (InputLayer)        │                   │            │                   │
├─────────────────────┼───────────────────┼────────────┼───────────────────┤
│ gemma_backbone      │ (None, None,      │ 2,614,341… │ padding_mask[0][… │
│ (GemmaBackbone)     │ 2304)             │            │ token_ids[0][0]   │
├─────────────────────┼───────────────────┼────────────┼───────────────────┤
│ pooler              │ (None, 2304)      │          0 │ gemma_backbone[0… │
│ (LastTokenPooler)   │                   │            │ padding_mask[0][… │
├─────────────────────┼───────────────────┼────────────┼───────────────────┤
│ pooled_dense        │ (None, 2048)      │  4,720,640 │ pooler[0][0]      │
│ (Dense)             │                   │            │                   │
├─────────────────────┼───────────────────┼────────────┼───────────────────┤
│ output_dropout      │ (None, 2048)      │          0 │ pooled_dense[0][… │
│ (Dropout)           │                   │            │                   │
├─────────────────────┼───────────────────┼────────────┼───────────────────┤
│ output_dense        │ (None, 2)         │      4,098 │ output_dropout[0… │
│ (Dense)             │                   │            │                   │
└─────────────────────┴───────────────────┴────────────┴───────────────────┘
Total params: 2,619,066,626 (9.76 GB)
Trainable params: 2,619,066,626 (9.76 GB)
Non-trainable params: 0 (0.00 B)
Before we train, there is one last trick we should employ to make this code run on free tier colab GPUs. We can see from our model summary our model takes up almost 10 gigabytes of space. An optimizer will need to make multiple copies of each parameter during training, taking the total space of our model during training close to 30 or 40 gigabytes.
This would OOM many GPUs. A useful trick we can employ is to enable LoRA on our backbone. LoRA is an approach which freezes the entire model, and only trains a low-parameter decomposition of large weight matrices. You can read more about LoRA in this Keras example. Let's try enabling it and re-printing our summary.
Model: "functional"
┏━━━━━━━━━━━━━━━━━━━━━┳━━━━━━━━━━━━━━━━━━━┳━━━━━━━━━━━━┳━━━━━━━━━━━━━━━━━━━┓
┃ Layer (type)        ┃ Output Shape      ┃    Param # ┃ Connected to      ┃
┡━━━━━━━━━━━━━━━━━━━━━╇━━━━━━━━━━━━━━━━━━━╇━━━━━━━━━━━━╇━━━━━━━━━━━━━━━━━━━┩
│ padding_mask        │ (None, None)      │          0 │ -                 │
│ (InputLayer)        │                   │            │                   │
├─────────────────────┼───────────────────┼────────────┼───────────────────┤
│ token_ids           │ (None, None)      │          0 │ -                 │
│ (InputLayer)        │                   │            │                   │
├─────────────────────┼───────────────────┼────────────┼───────────────────┤
│ gemma_backbone      │ (None, None,      │ 2,617,270… │ padding_mask[0][… │
│ (GemmaBackbone)     │ 2304)             │            │ token_ids[0][0]   │
├─────────────────────┼───────────────────┼────────────┼───────────────────┤
│ pooler              │ (None, 2304)      │          0 │ gemma_backbone[0… │
│ (LastTokenPooler)   │                   │            │ padding_mask[0][… │
├─────────────────────┼───────────────────┼────────────┼───────────────────┤
│ pooled_dense        │ (None, 2048)      │  4,720,640 │ pooler[0][0]      │
│ (Dense)             │                   │            │                   │
├─────────────────────┼───────────────────┼────────────┼───────────────────┤
│ output_dropout      │ (None, 2048)      │          0 │ pooled_dense[0][… │
│ (Dropout)           │                   │            │                   │
├─────────────────────┼───────────────────┼────────────┼───────────────────┤
│ output_dense        │ (None, 2)         │      4,098 │ output_dropout[0… │
│ (Dense)             │                   │            │                   │
└─────────────────────┴───────────────────┴────────────┴───────────────────┘
Total params: 2,621,995,266 (9.77 GB)
Trainable params: 7,653,378 (29.20 MB)
Non-trainable params: 2,614,341,888 (9.74 GB)
After enabling LoRA, our model goes from 10GB of traininable parameters to just 20MB. That means the space used by optimizer variables will no longer be a concern.
With all that set up, we can compile and train our model as normal.
<keras.src.callbacks.history.History at 0x787e103ae010>