For more information about community pipelines, please have a look at this issue.
Community examples consist of both inference and training examples that have been added by the community. Please have a look at the following table to get an overview of all community examples. Click on the Code Example to get a copy-and-paste ready code example that you can try out. If a community doesn't work as expected, please open an issue and ping the author on it.
To load a custom pipeline you just need to pass the custom_pipeline argument to DiffusionPipeline, as one of the files in diffusers/examples/community. Feel free to send a PR with your own pipelines, we will merge them quickly.
pipe = DiffusionPipeline.from_pretrained("runwayml/stable-diffusion-v1-5", custom_pipeline="filename_in_the_community_folder")
Example usages
CLIP Guided Stable Diffusion
CLIP guided stable diffusion can help to generate more realistic images by guiding stable diffusion at every denoising step with an additional CLIP model.
The following code requires roughly 12GB of GPU RAM.
from diffusers import DiffusionPipeline
from transformers import CLIPImageProcessor, CLIPModel
import torch
feature_extractor = CLIPImageProcessor.from_pretrained("laion/CLIP-ViT-B-32-laion2B-s34B-b79K")
clip_model = CLIPModel.from_pretrained("laion/CLIP-ViT-B-32-laion2B-s34B-b79K", torch_dtype=torch.float16)
guided_pipeline = DiffusionPipeline.from_pretrained(
"runwayml/stable-diffusion-v1-5",
custom_pipeline="clip_guided_stable_diffusion",
clip_model=clip_model,
feature_extractor=feature_extractor,
torch_dtype=torch.float16,
)
guided_pipeline.enable_attention_slicing()
guided_pipeline = guided_pipeline.to("cuda")
prompt = "fantasy book cover, full moon, fantasy forest landscape, golden vector elements, fantasy magic, dark light night, intricate, elegant, sharp focus, illustration, highly detailed, digital painting, concept art, matte, art by WLOP and Artgerm and Albert Bierstadt, masterpiece"
generator = torch.Generator(device="cuda").manual_seed(0)
images = []
for i in range(4):
image = guided_pipeline(
prompt,
num_inference_steps=50,
guidance_scale=7.5,
clip_guidance_scale=100,
num_cutouts=4,
use_cutouts=False,
generator=generator,
).images[0]
images.append(image)
for i, img in enumerate(images):
img.save(f"./clip_guided_sd/image_{i}.png")
The images list contains a list of PIL images that can be saved locally or displayed directly in a google colab. Generated images tend to be of higher qualtiy than natively using stable diffusion. E.g. the above script generates the following images:
 .
.
One Step Unet
The dummy "one-step-unet" can be run as follows:
from diffusers import DiffusionPipeline

pipe = DiffusionPipeline.from_pretrained("google/ddpm-cifar10-32", custom_pipeline="one_step_unet")
pipe()
Note: This community pipeline is not useful as a feature, but rather just serves as an example of how community pipelines can be added (see https://github.com/huggingface/diffusers/issues/841).
Stable Diffusion Interpolation
The following code can be run on a GPU of at least 8GB VRAM and should take approximately 5 minutes.
from diffusers import DiffusionPipeline
import torch
pipe = DiffusionPipeline.from_pretrained(
"CompVis/stable-diffusion-v1-4",
revision='fp16',
torch_dtype=torch.float16,
safety_checker=None,
custom_pipeline="interpolate_stable_diffusion",
).to('cuda')
pipe.enable_attention_slicing()
frame_filepaths = pipe.walk(
prompts=['a dog', 'a cat', 'a horse'],
seeds=[42, 1337, 1234],
num_interpolation_steps=16,
output_dir='./dreams',
batch_size=4,
height=512,
width=512,
guidance_scale=8.5,
num_inference_steps=50,
)
The output of the walk(...) function returns a list of images saved under the folder as defined in output_dir. You can use these images to create videos of stable diffusion.
Please have a look at https://github.com/nateraw/stable-diffusion-videos for more in-detail information on how to create videos using stable diffusion as well as more feature-complete functionality.
Stable Diffusion Mega
The Stable Diffusion Mega Pipeline lets you use the main use cases of the stable diffusion pipeline in a single class.
from diffusers import DiffusionPipeline
import PIL
import requests
from io import BytesIO
import torch
def download_image(url):
response = requests.get(url)
return PIL.Image.open(BytesIO(response.content)).convert("RGB")
pipe = DiffusionPipeline.from_pretrained("runwayml/stable-diffusion-v1-5", custom_pipeline="stable_diffusion_mega", torch_dtype=torch.float16, revision="fp16")
pipe.to("cuda")
pipe.enable_attention_slicing()
images = pipe.text2img("An astronaut riding a horse").images
init_image = download_image("https://raw.githubusercontent.com/CompVis/stable-diffusion/main/assets/stable-samples/img2img/sketch-mountains-input.jpg")
prompt = "A fantasy landscape, trending on artstation"
images = pipe.img2img(prompt=prompt, image=init_image, strength=0.75, guidance_scale=7.5).images
img_url = "https://raw.githubusercontent.com/CompVis/latent-diffusion/main/data/inpainting_examples/overture-creations-5sI6fQgYIuo.png"
mask_url = "https://raw.githubusercontent.com/CompVis/latent-diffusion/main/data/inpainting_examples/overture-creations-5sI6fQgYIuo_mask.png"
init_image = download_image(img_url).resize((512, 512))
mask_image = download_image(mask_url).resize((512, 512))
prompt = "a cat sitting on a bench"
images = pipe.inpaint(prompt=prompt, image=init_image, mask_image=mask_image, strength=0.75).images
As shown above this one pipeline can run all both "text-to-image", "image-to-image", and "inpainting" in one pipeline.
Long Prompt Weighting Stable Diffusion
Features of this custom pipeline:
Input a prompt without the 77 token length limit.
Includes tx2img, img2img. and inpainting pipelines.
Emphasize/weigh part of your prompt with parentheses as so: a baby deer with (big eyes)
De-emphasize part of your prompt as so: a [baby] deer with big eyes
Precisely weigh part of your prompt as so: a baby deer with (big eyes:1.3)
Prompt weighting equivalents:
a baby deer with == (a baby deer with:1.0)
(big eyes) == (big eyes:1.1)
((big eyes)) == (big eyes:1.21)
[big eyes] == (big eyes:0.91)
You can run this custom pipeline as so:
pytorch
from diffusers import DiffusionPipeline
import torch

pipe = DiffusionPipeline.from_pretrained(
    'hakurei/waifu-diffusion',
    custom_pipeline="lpw_stable_diffusion",

    torch_dtype=torch.float16
)
pipe=pipe.to("cuda")

prompt = "best_quality (1girl:1.3) bow bride brown_hair closed_mouth frilled_bow frilled_hair_tubes frills (full_body:1.3) fox_ear hair_bow hair_tubes happy hood japanese_clothes kimono long_sleeves red_bow smile solo tabi uchikake white_kimono wide_sleeves cherry_blossoms"
neg_prompt = "lowres, bad_anatomy, error_body, error_hair, error_arm, error_hands, bad_hands, error_fingers, bad_fingers, missing_fingers, error_legs, bad_legs, multiple_legs, missing_legs, error_lighting, error_shadow, error_reflection, text, error, extra_digit, fewer_digits, cropped, worst_quality, low_quality, normal_quality, jpeg_artifacts, signature, watermark, username, blurry"

pipe.text2img(prompt, negative_prompt=neg_prompt, width=512,height=512,max_embeddings_multiples=3).images[0]
onnxruntime
from diffusers import DiffusionPipeline
import torch

pipe = DiffusionPipeline.from_pretrained(
    'CompVis/stable-diffusion-v1-4',
    custom_pipeline="lpw_stable_diffusion_onnx",
    revision="onnx",
    provider="CUDAExecutionProvider"
)

prompt = "a photo of an astronaut riding a horse on mars, best quality"
neg_prompt = "lowres, bad anatomy, error body, error hair, error arm, error hands, bad hands, error fingers, bad fingers, missing fingers, error legs, bad legs, multiple legs, missing legs, error lighting, error shadow, error reflection, text, error, extra digit, fewer digits, cropped, worst quality, low quality, normal quality, jpeg artifacts, signature, watermark, username, blurry"

pipe.text2img(prompt,negative_prompt=neg_prompt, width=512, height=512, max_embeddings_multiples=3).images[0]
if you see Token indices sequence length is longer than the specified maximum sequence length for this model ( *** > 77 ) . Running this sequence through the model will result in indexing errors. Do not worry, it is normal.
Speech to Image
The following code can generate an image from an audio sample using pre-trained OpenAI whisper-small and Stable Diffusion.
import torch

import matplotlib.pyplot as plt
from datasets import load_dataset
from diffusers import DiffusionPipeline
from transformers import (
    WhisperForConditionalGeneration,
    WhisperProcessor,
)


device = "cuda" if torch.cuda.is_available() else "cpu"

ds = load_dataset("hf-internal-testing/librispeech_asr_dummy", "clean", split="validation")

audio_sample = ds[3]

text = audio_sample["text"].lower()
speech_data = audio_sample["audio"]["array"]

model = WhisperForConditionalGeneration.from_pretrained("openai/whisper-small").to(device)
processor = WhisperProcessor.from_pretrained("openai/whisper-small")

diffuser_pipeline = DiffusionPipeline.from_pretrained(
    "CompVis/stable-diffusion-v1-4",
    custom_pipeline="speech_to_image_diffusion",
    speech_model=model,
    speech_processor=processor,

    torch_dtype=torch.float16,
)

diffuser_pipeline.enable_attention_slicing()
diffuser_pipeline = diffuser_pipeline.to(device)

output = diffuser_pipeline(speech_data)
plt.imshow(output.images[0])
This example produces the following image:
Wildcard Stable Diffusion
Following the great examples from https://github.com/jtkelm2/stable-diffusion-webui-1/blob/master/scripts/wildcards.py and https://github.com/AUTOMATIC1111/stable-diffusion-webui/wiki/Custom-Scripts#wildcards, here's a minimal implementation that allows for users to add "wildcards", denoted by __wildcard__ to prompts that are used as placeholders for randomly sampled values given by either a dictionary or a .txt file. For example:
Say we have a prompt:
prompt = "__animal__ sitting on a __object__ wearing a __clothing__"
We can then define possible values to be sampled for animal, object, and clothing. These can either be from a .txt with the same name as the category.
The possible values can also be defined / combined by using a dictionary like: {"animal":["dog", "cat", mouse"]}.
The actual pipeline works just like StableDiffusionPipeline, except the __call__ method takes in:
wildcard_files: list of file paths for wild card replacement wildcard_option_dict: dict with key as wildcard and values as a list of possible replacements num_prompt_samples: number of prompts to sample, uniformly sampling wildcards
A full example:
create animal.txt, with contents like:
create object.txt, with contents like:
from diffusers import DiffusionPipeline
import torch

pipe = DiffusionPipeline.from_pretrained(
    "CompVis/stable-diffusion-v1-4",
    custom_pipeline="wildcard_stable_diffusion",

    torch_dtype=torch.float16,
)
prompt = "__animal__ sitting on a __object__ wearing a __clothing__"
out = pipe(
    prompt,
    wildcard_option_dict={
        "clothing":["hat", "shirt", "scarf", "beret"]
    },
    wildcard_files=["object.txt", "animal.txt"],
    num_prompt_samples=1
)
Composable Stable diffusion
Composable Stable Diffusion proposes conjunction and negation (negative prompts) operators for compositional generation with conditional diffusion models.
import torch as th
import numpy as np
import torchvision.utils as tvu

from diffusers import DiffusionPipeline

import argparse

parser = argparse.ArgumentParser()
parser.add_argument("--prompt", type=str, default="mystical trees | A magical pond | dark",
                    help="use '|' as the delimiter to compose separate sentences.")
parser.add_argument("--steps", type=int, default=50)
parser.add_argument("--scale", type=float, default=7.5)
parser.add_argument("--weights", type=str, default="7.5 | 7.5 | -7.5")
parser.add_argument("--seed", type=int, default=2)
parser.add_argument("--model_path", type=str, default="CompVis/stable-diffusion-v1-4")
parser.add_argument("--num_images", type=int, default=1)
args = parser.parse_args()

has_cuda = th.cuda.is_available()
device = th.device('cpu' if not has_cuda else 'cuda')

prompt = args.prompt
scale = args.scale
steps = args.steps

pipe = DiffusionPipeline.from_pretrained(
    args.model_path,
    custom_pipeline="composable_stable_diffusion",
).to(device)

pipe.safety_checker = None

images = []
generator = th.Generator("cuda").manual_seed(args.seed)
for i in range(args.num_images):
    image = pipe(prompt, guidance_scale=scale, num_inference_steps=steps,
                 weights=args.weights, generator=generator).images[0]
    images.append(th.from_numpy(np.array(image)).permute(2, 0, 1) / 255.)
grid = tvu.make_grid(th.stack(images, dim=0), nrow=4, padding=0)
tvu.save_image(grid, f'{prompt}_{args.weights}' + '.png')
Imagic Stable Diffusion
Allows you to edit an image using stable diffusion.
import requests
from PIL import Image
from io import BytesIO
import torch
import os
from diffusers import DiffusionPipeline, DDIMScheduler
has_cuda = torch.cuda.is_available()
device = torch.device('cpu' if not has_cuda else 'cuda')
pipe = DiffusionPipeline.from_pretrained(
    "CompVis/stable-diffusion-v1-4",
        safety_checker=None,
    use_auth_token=True,
    custom_pipeline="imagic_stable_diffusion",
    scheduler = DDIMScheduler(beta_start=0.00085, beta_end=0.012, beta_schedule="scaled_linear", clip_sample=False, set_alpha_to_one=False)
).to(device)
generator = torch.Generator("cuda").manual_seed(0)
seed = 0
prompt = "A photo of Barack Obama smiling with a big grin"
url = 'https://www.dropbox.com/s/6tlwzr73jd1r9yk/obama.png?dl=1'
response = requests.get(url)
init_image = Image.open(BytesIO(response.content)).convert("RGB")
init_image = init_image.resize((512, 512))
res = pipe.train(
    prompt,
    image=init_image,
    generator=generator)
res = pipe(alpha=1, guidance_scale=7.5, num_inference_steps=50)
os.makedirs("imagic", exist_ok=True)
image = res.images[0]
image.save('./imagic/imagic_image_alpha_1.png')
res = pipe(alpha=1.5, guidance_scale=7.5, num_inference_steps=50)
image = res.images[0]
image.save('./imagic/imagic_image_alpha_1_5.png')
res = pipe(alpha=2, guidance_scale=7.5, num_inference_steps=50)
image = res.images[0]
image.save('./imagic/imagic_image_alpha_2.png')
Seed Resizing
Test seed resizing. Originally generate an image in 512 by 512, then generate image with same seed at 512 by 592 using seed resizing. Finally, generate 512 by 592 using original stable diffusion pipeline.
import torch as th
import numpy as np
from diffusers import DiffusionPipeline

has_cuda = th.cuda.is_available()
device = th.device('cpu' if not has_cuda else 'cuda')

pipe = DiffusionPipeline.from_pretrained(
    "CompVis/stable-diffusion-v1-4",
    use_auth_token=True,
    custom_pipeline="seed_resize_stable_diffusion"
).to(device)

def dummy(images, **kwargs):
    return images, False

pipe.safety_checker = dummy


images = []
th.manual_seed(0)
generator = th.Generator("cuda").manual_seed(0)

seed = 0
prompt = "A painting of a futuristic cop"

width = 512
height = 512

res = pipe(
    prompt,
    guidance_scale=7.5,
    num_inference_steps=50,
    height=height,
    width=width,
    generator=generator)
image = res.images[0]
image.save('./seed_resize/seed_resize_{w}_{h}_image.png'.format(w=width, h=height))


th.manual_seed(0)
generator = th.Generator("cuda").manual_seed(0)

pipe = DiffusionPipeline.from_pretrained(
    "CompVis/stable-diffusion-v1-4",
    use_auth_token=True,
    custom_pipeline="/home/mark/open_source/diffusers/examples/community/"
).to(device)

width = 512
height = 592

res = pipe(
    prompt,
    guidance_scale=7.5,
    num_inference_steps=50,
    height=height,
    width=width,
    generator=generator)
image = res.images[0]
image.save('./seed_resize/seed_resize_{w}_{h}_image.png'.format(w=width, h=height))

pipe_compare = DiffusionPipeline.from_pretrained(
    "CompVis/stable-diffusion-v1-4",
    use_auth_token=True,
    custom_pipeline="/home/mark/open_source/diffusers/examples/community/"
).to(device)

res = pipe_compare(
    prompt,
    guidance_scale=7.5,
    num_inference_steps=50,
    height=height,
    width=width,
    generator=generator
)

image = res.images[0]
image.save('./seed_resize/seed_resize_{w}_{h}_image_compare.png'.format(w=width, h=height))
Multilingual Stable Diffusion Pipeline
The following code can generate an images from texts in different languages using the pre-trained mBART-50 many-to-one multilingual machine translation model and Stable Diffusion.
from PIL import Image
import torch
from diffusers import DiffusionPipeline
from transformers import (
pipeline,
MBart50TokenizerFast,
MBartForConditionalGeneration,
)
device = "cuda" if torch.cuda.is_available() else "cpu"
device_dict = {"cuda": 0, "cpu": -1}
def image_grid(imgs, rows, cols):
assert len(imgs) == rows*cols
w, h = imgs[0].size
grid = Image.new('RGB', size=(cols*w, rows*h))
grid_w, grid_h = grid.size
for i, img in enumerate(imgs):
grid.paste(img, box=(i%cols*w, i//cols*h))
return grid
language_detection_model_ckpt = "papluca/xlm-roberta-base-language-detection"
language_detection_pipeline = pipeline("text-classification",
model=language_detection_model_ckpt,
device=device_dict[device])
trans_tokenizer = MBart50TokenizerFast.from_pretrained("facebook/mbart-large-50-many-to-one-mmt")
trans_model = MBartForConditionalGeneration.from_pretrained("facebook/mbart-large-50-many-to-one-mmt").to(device)
diffuser_pipeline = DiffusionPipeline.from_pretrained(
"CompVis/stable-diffusion-v1-4",
custom_pipeline="multilingual_stable_diffusion",
detection_pipeline=language_detection_pipeline,
translation_model=trans_model,
translation_tokenizer=trans_tokenizer,
torch_dtype=torch.float16,
)
diffuser_pipeline.enable_attention_slicing()
diffuser_pipeline = diffuser_pipeline.to(device)
prompt = ["a photograph of an astronaut riding a horse",
"Una casa en la playa",
"Ein Hund, der Orange isst",
"Un restaurant parisien"]
output = diffuser_pipeline(prompt)
images = output.images
grid = image_grid(images, rows=2, cols=2)
This example produces the following images: 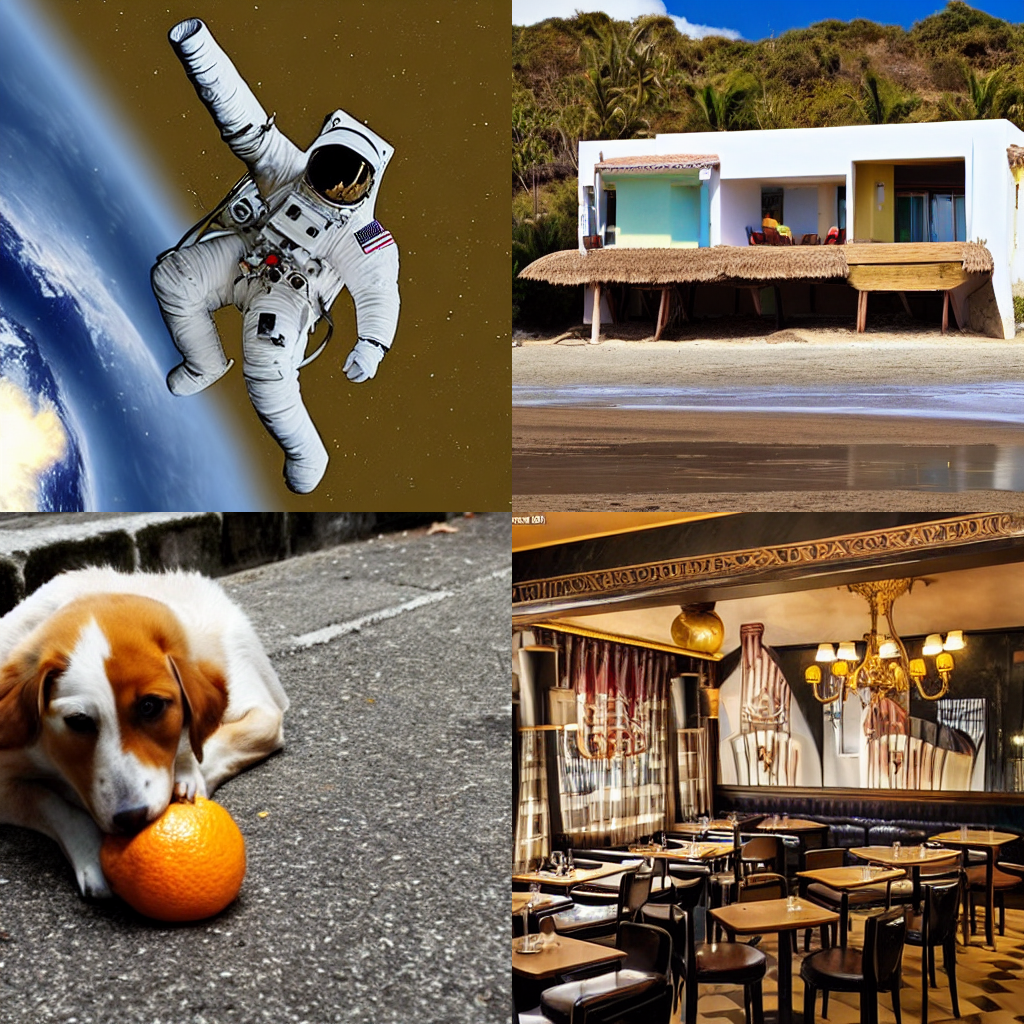
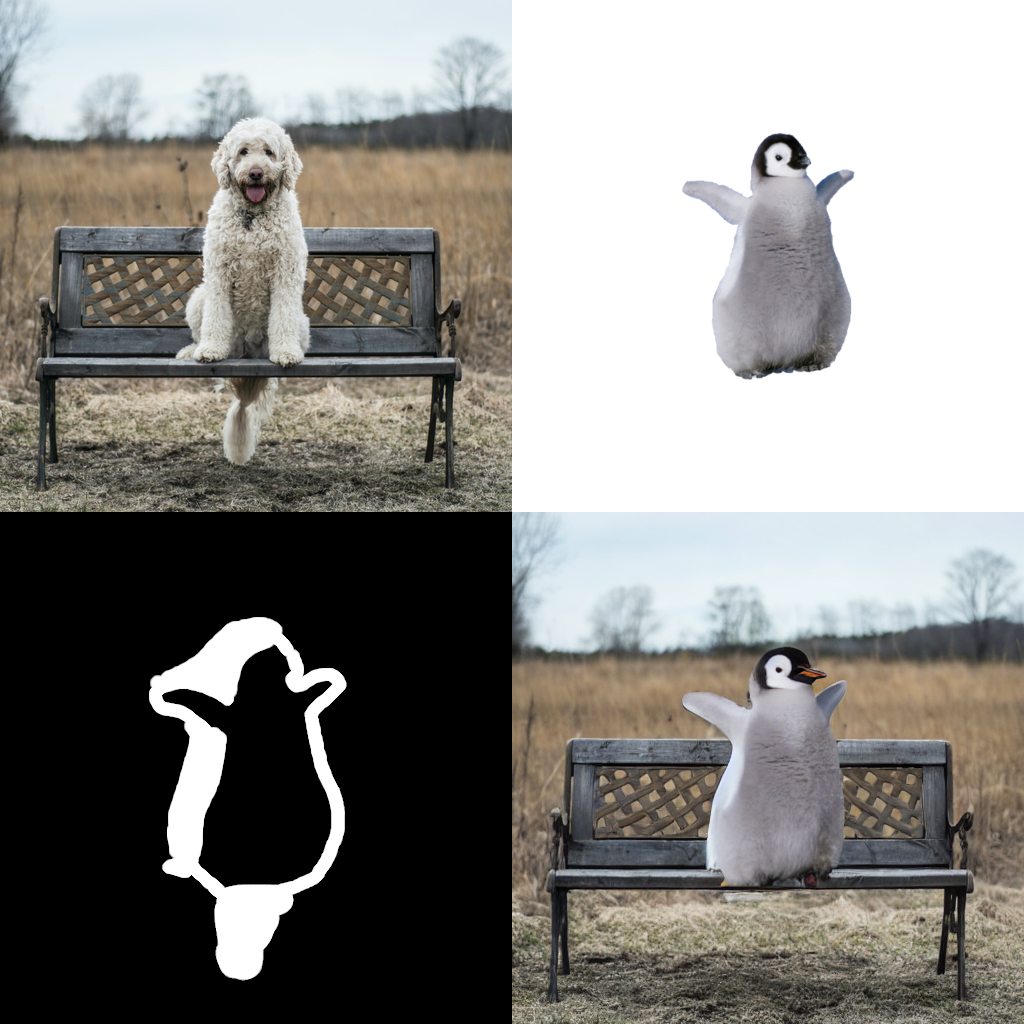
Image to Image Inpainting Stable Diffusion
Similar to the standard stable diffusion inpainting example, except with the addition of an inner_image argument.
image, inner_image, and mask should have the same dimensions. inner_image should have an alpha (transparency) channel.
The aim is to overlay two images, then mask out the boundary between image and inner_image to allow stable diffusion to make the connection more seamless. For example, this could be used to place a logo on a shirt and make it blend seamlessly.
import PIL
import torch

from diffusers import DiffusionPipeline

image_path = "./path-to-image.png"
inner_image_path = "./path-to-inner-image.png"
mask_path = "./path-to-mask.png"

init_image = PIL.Image.open(image_path).convert("RGB").resize((512, 512))
inner_image = PIL.Image.open(inner_image_path).convert("RGBA").resize((512, 512))
mask_image = PIL.Image.open(mask_path).convert("RGB").resize((512, 512))

pipe = DiffusionPipeline.from_pretrained(
    "runwayml/stable-diffusion-inpainting",
    custom_pipeline="img2img_inpainting",

    torch_dtype=torch.float16
)
pipe = pipe.to("cuda")

prompt = "Your prompt here!"
image = pipe(prompt=prompt, image=init_image, inner_image=inner_image, mask_image=mask_image).images[0]
Text Based Inpainting Stable Diffusion
Use a text prompt to generate the mask for the area to be inpainted. Currently uses the CLIPSeg model for mask generation, then calls the standard Stable Diffusion Inpainting pipeline to perform the inpainting.
from transformers import CLIPSegProcessor, CLIPSegForImageSegmentation
from diffusers import DiffusionPipeline
from PIL import Image
import requests
processor = CLIPSegProcessor.from_pretrained("CIDAS/clipseg-rd64-refined")
model = CLIPSegForImageSegmentation.from_pretrained("CIDAS/clipseg-rd64-refined")
pipe = DiffusionPipeline.from_pretrained(
"runwayml/stable-diffusion-inpainting",
custom_pipeline="text_inpainting",
segmentation_model=model,
segmentation_processor=processor
)
pipe = pipe.to("cuda")
url = "https://github.com/timojl/clipseg/blob/master/example_image.jpg?raw=true"
image = Image.open(requests.get(url, stream=True).raw).resize((512, 512))
text = "a glass"
prompt = "a cup"
image = pipe(image=image, text=text, prompt=prompt).images[0]
Bit Diffusion
Based https://arxiv.org/abs/2208.04202, this is used for diffusion on discrete data - eg, discreate image data, DNA sequence data. An unconditional discreate image can be generated like this:
from diffusers import DiffusionPipeline
pipe = DiffusionPipeline.from_pretrained("google/ddpm-cifar10-32", custom_pipeline="bit_diffusion")
image = pipe().images[0]
Stable Diffusion with K Diffusion
Make sure you have @crowsonkb's https://github.com/crowsonkb/k-diffusion installed:
You can use the community pipeline as follows:
from diffusers import DiffusionPipeline

pipe = DiffusionPipeline.from_pretrained("CompVis/stable-diffusion-v1-4", custom_pipeline="sd_text2img_k_diffusion")
pipe = pipe.to("cuda")

prompt = "an astronaut riding a horse on mars"
pipe.set_scheduler("sample_heun")
generator = torch.Generator(device="cuda").manual_seed(seed)
image = pipe(prompt, generator=generator, num_inference_steps=20).images[0]

image.save("./astronaut_heun_k_diffusion.png")
To make sure that K Diffusion and diffusers yield the same results:
Diffusers:
from diffusers import DiffusionPipeline, EulerDiscreteScheduler

seed = 33

pipe = DiffusionPipeline.from_pretrained("CompVis/stable-diffusion-v1-4")
pipe.scheduler = EulerDiscreteScheduler.from_config(pipe.scheduler.config)
pipe = pipe.to("cuda")

generator = torch.Generator(device="cuda").manual_seed(seed)
image = pipe(prompt, generator=generator, num_inference_steps=50).images[0]

K Diffusion:
from diffusers import DiffusionPipeline, EulerDiscreteScheduler

seed = 33

pipe = DiffusionPipeline.from_pretrained("CompVis/stable-diffusion-v1-4", custom_pipeline="sd_text2img_k_diffusion")
pipe.scheduler = EulerDiscreteScheduler.from_config(pipe.scheduler.config)
pipe = pipe.to("cuda")

pipe.set_scheduler("sample_euler")
generator = torch.Generator(device="cuda").manual_seed(seed)
image = pipe(prompt, generator=generator, num_inference_steps=50).images[0]

Checkpoint Merger Pipeline
Based on the AUTOMATIC1111/webui for checkpoint merging. This is a custom pipeline that merges upto 3 pretrained model checkpoints as long as they are in the HuggingFace model_index.json format.
The checkpoint merging is currently memory intensive as it modifies the weights of a DiffusionPipeline object in place. Expect atleast 13GB RAM Usage on Kaggle GPU kernels and on colab you might run out of the 12GB memory even while merging two checkpoints.
Usage:-
from diffusers import DiffusionPipeline
pipe = DiffusionPipeline.from_pretrained("CompVis/stable-diffusion-v1-4", custom_pipeline="checkpoint_merger")
merged_pipe = pipe.merge(["CompVis/stable-diffusion-v1-4","CompVis/stable-diffusion-v1-2"], interp = "sigmoid", alpha = 0.4)
merged_pipe_1 = pipe.merge(["CompVis/stable-diffusion-v1-4","hakurei/waifu-diffusion"], force = True, interp = "sigmoid", alpha = 0.4)
merged_pipe_2 = pipe.merge(["CompVis/stable-diffusion-v1-4","hakurei/waifu-diffusion","prompthero/openjourney"], force = True, interp = "add_difference", alpha = 0.4)
prompt = "An astronaut riding a horse on Mars"
image = merged_pipe(prompt).images[0]
Some examples along with the merge details:
"CompVis/stable-diffusion-v1-4" + "hakurei/waifu-diffusion" ; Sigmoid interpolation; alpha = 0.8

"hakurei/waifu-diffusion" + "prompthero/openjourney" ; Inverse Sigmoid interpolation; alpha = 0.8

"CompVis/stable-diffusion-v1-4" + "hakurei/waifu-diffusion" + "prompthero/openjourney"; Add Difference interpolation; alpha = 0.5

Stable Diffusion Comparisons
This Community Pipeline enables the comparison between the 4 checkpoints that exist for Stable Diffusion. They can be found through the following links:
Stable Diffusion v1.1
Stable Diffusion v1.2
Stable Diffusion v1.3
Stable Diffusion v1.4
from diffusers import DiffusionPipeline
import matplotlib.pyplot as plt

pipe = DiffusionPipeline.from_pretrained('CompVis/stable-diffusion-v1-4', custom_pipeline='suvadityamuk/StableDiffusionComparison')
pipe.enable_attention_slicing()
pipe = pipe.to('cuda')
prompt = "an astronaut riding a horse on mars"
output = pipe(prompt)

plt.subplots(2,2,1)
plt.imshow(output.images[0])
plt.title('Stable Diffusion v1.1')
plt.axis('off')
plt.subplots(2,2,2)
plt.imshow(output.images[1])
plt.title('Stable Diffusion v1.2')
plt.axis('off')
plt.subplots(2,2,3)
plt.imshow(output.images[2])
plt.title('Stable Diffusion v1.3')
plt.axis('off')
plt.subplots(2,2,4)
plt.imshow(output.images[3])
plt.title('Stable Diffusion v1.4')
plt.axis('off')

plt.show()
As a result, you can look at a grid of all 4 generated images being shown together, that captures a difference the advancement of the training between the 4 checkpoints.
Magic Mix
Implementation of the MagicMix: Semantic Mixing with Diffusion Models paper. This is a Diffusion Pipeline for semantic mixing of an image and a text prompt to create a new concept while preserving the spatial layout and geometry of the subject in the image. The pipeline takes an image that provides the layout semantics and a prompt that provides the content semantics for the mixing process.
There are 3 parameters for the method-
mix_factor: It is the interpolation constant used in the layout generation phase. The greater the value of mix_factor, the greater the influence of the prompt on the layout generation process.
kmax and kmin: These determine the range for the layout and content generation process. A higher value of kmax results in loss of more information about the layout of the original image and a higher value of kmin results in more steps for content generation process.
Here is an example usage-
from diffusers import DiffusionPipeline, DDIMScheduler
from PIL import Image
pipe = DiffusionPipeline.from_pretrained(
"CompVis/stable-diffusion-v1-4",
custom_pipeline="magic_mix",
scheduler = DDIMScheduler.from_pretrained("CompVis/stable-diffusion-v1-4", subfolder="scheduler"),
).to('cuda')
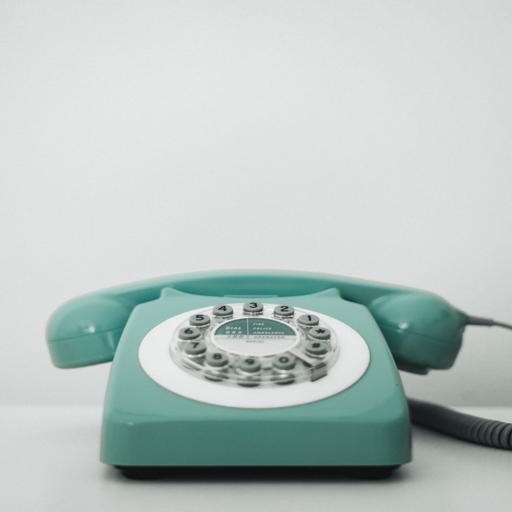
img = Image.open('phone.jpg')
mix_img = pipe(
img,
prompt = 'bed',
kmin = 0.3,
kmax = 0.5,
mix_factor = 0.5,
)
mix_img.save('phone_bed_mix.jpg')
The mix_img is a PIL image that can be saved locally or displayed directly in a google colab. Generated image is a mix of the layout semantics of the given image and the content semantics of the prompt.
E.g. the above script generates the following image:
phone.jpg
phone_bed_mix.jpg

For more example generations check out this demo notebook.
Stable UnCLIP
UnCLIPPipeline("kakaobrain/karlo-v1-alpha") provide a prior model that can generate clip image embedding from text. StableDiffusionImageVariationPipeline("lambdalabs/sd-image-variations-diffusers") provide a decoder model than can generate images from clip image embedding.
import torch
from diffusers import DiffusionPipeline
device = torch.device("cpu" if not torch.cuda.is_available() else "cuda")
pipeline = DiffusionPipeline.from_pretrained(
"kakaobrain/karlo-v1-alpha",
torch_dtype=torch.float16,
custom_pipeline="stable_unclip",
decoder_pipe_kwargs=dict(
image_encoder=None,
),
)
pipeline.to(device)
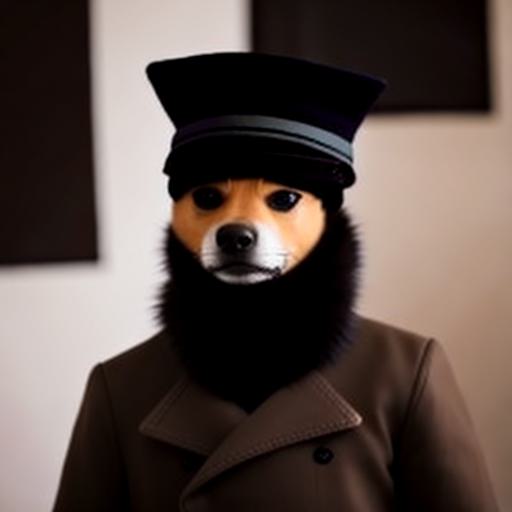
prompt = "a shiba inu wearing a beret and black turtleneck"
random_generator = torch.Generator(device=device).manual_seed(1000)
output = pipeline(
prompt=prompt,
width=512,
height=512,
generator=random_generator,
prior_guidance_scale=4,
prior_num_inference_steps=25,
decoder_guidance_scale=8,
decoder_num_inference_steps=50,
)
image = output.images[0]
image.save("./shiba-inu.jpg")
print(pipeline.decoder_pipe.__class__)
print(pipeline)
print(pipeline.prior_scheduler)
shiba-inu.jpg
UnCLIP Text Interpolation Pipeline
This Diffusion Pipeline takes two prompts and interpolates between the two input prompts using spherical interpolation ( slerp ). The input prompts are converted to text embeddings by the pipeline's text_encoder and the interpolation is done on the resulting text_embeddings over the number of steps specified. Defaults to 5 steps.
import torch
from diffusers import DiffusionPipeline
device = torch.device("cpu" if not torch.cuda.is_available() else "cuda")
pipe = DiffusionPipeline.from_pretrained(
"kakaobrain/karlo-v1-alpha",
torch_dtype=torch.float16,
custom_pipeline="unclip_text_interpolation"
)
pipe.to(device)
start_prompt = "A photograph of an adult lion"
end_prompt = "A photograph of a lion cub"
generator = torch.Generator(device=device).manual_seed(42)
output = pipe(start_prompt, end_prompt, steps = 6, generator = generator, enable_sequential_cpu_offload=False)
for i,image in enumerate(output.images):
img.save('result%s.jpg' % i)
The resulting images in order:-


UnCLIP Image Interpolation Pipeline
This Diffusion Pipeline takes two images or an image_embeddings tensor of size 2 and interpolates between their embeddings using spherical interpolation ( slerp ). The input images/image_embeddings are converted to image embeddings by the pipeline's image_encoder and the interpolation is done on the resulting image_embeddings over the number of steps specified. Defaults to 5 steps.
import torch
from diffusers import DiffusionPipeline
from PIL import Image
device = torch.device("cpu" if not torch.cuda.is_available() else "cuda")
dtype = torch.float16 if torch.cuda.is_available() else torch.bfloat16
pipe = DiffusionPipeline.from_pretrained(
"kakaobrain/karlo-v1-alpha-image-variations",
torch_dtype=dtype,
custom_pipeline="unclip_image_interpolation"
)
pipe.to(device)
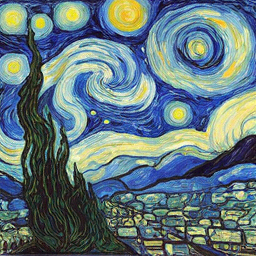
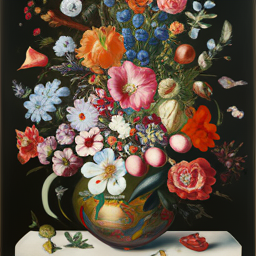
images = [Image.open('./starry_night.jpg'), Image.open('./flowers.jpg')]
generator = torch.Generator(device=device).manual_seed(42)
output = pipe(image = images ,steps = 6, generator = generator)
for i,image in enumerate(output.images):
image.save('starry_to_flowers_%s.jpg' % i)
The original images:-


The resulting images in order:-


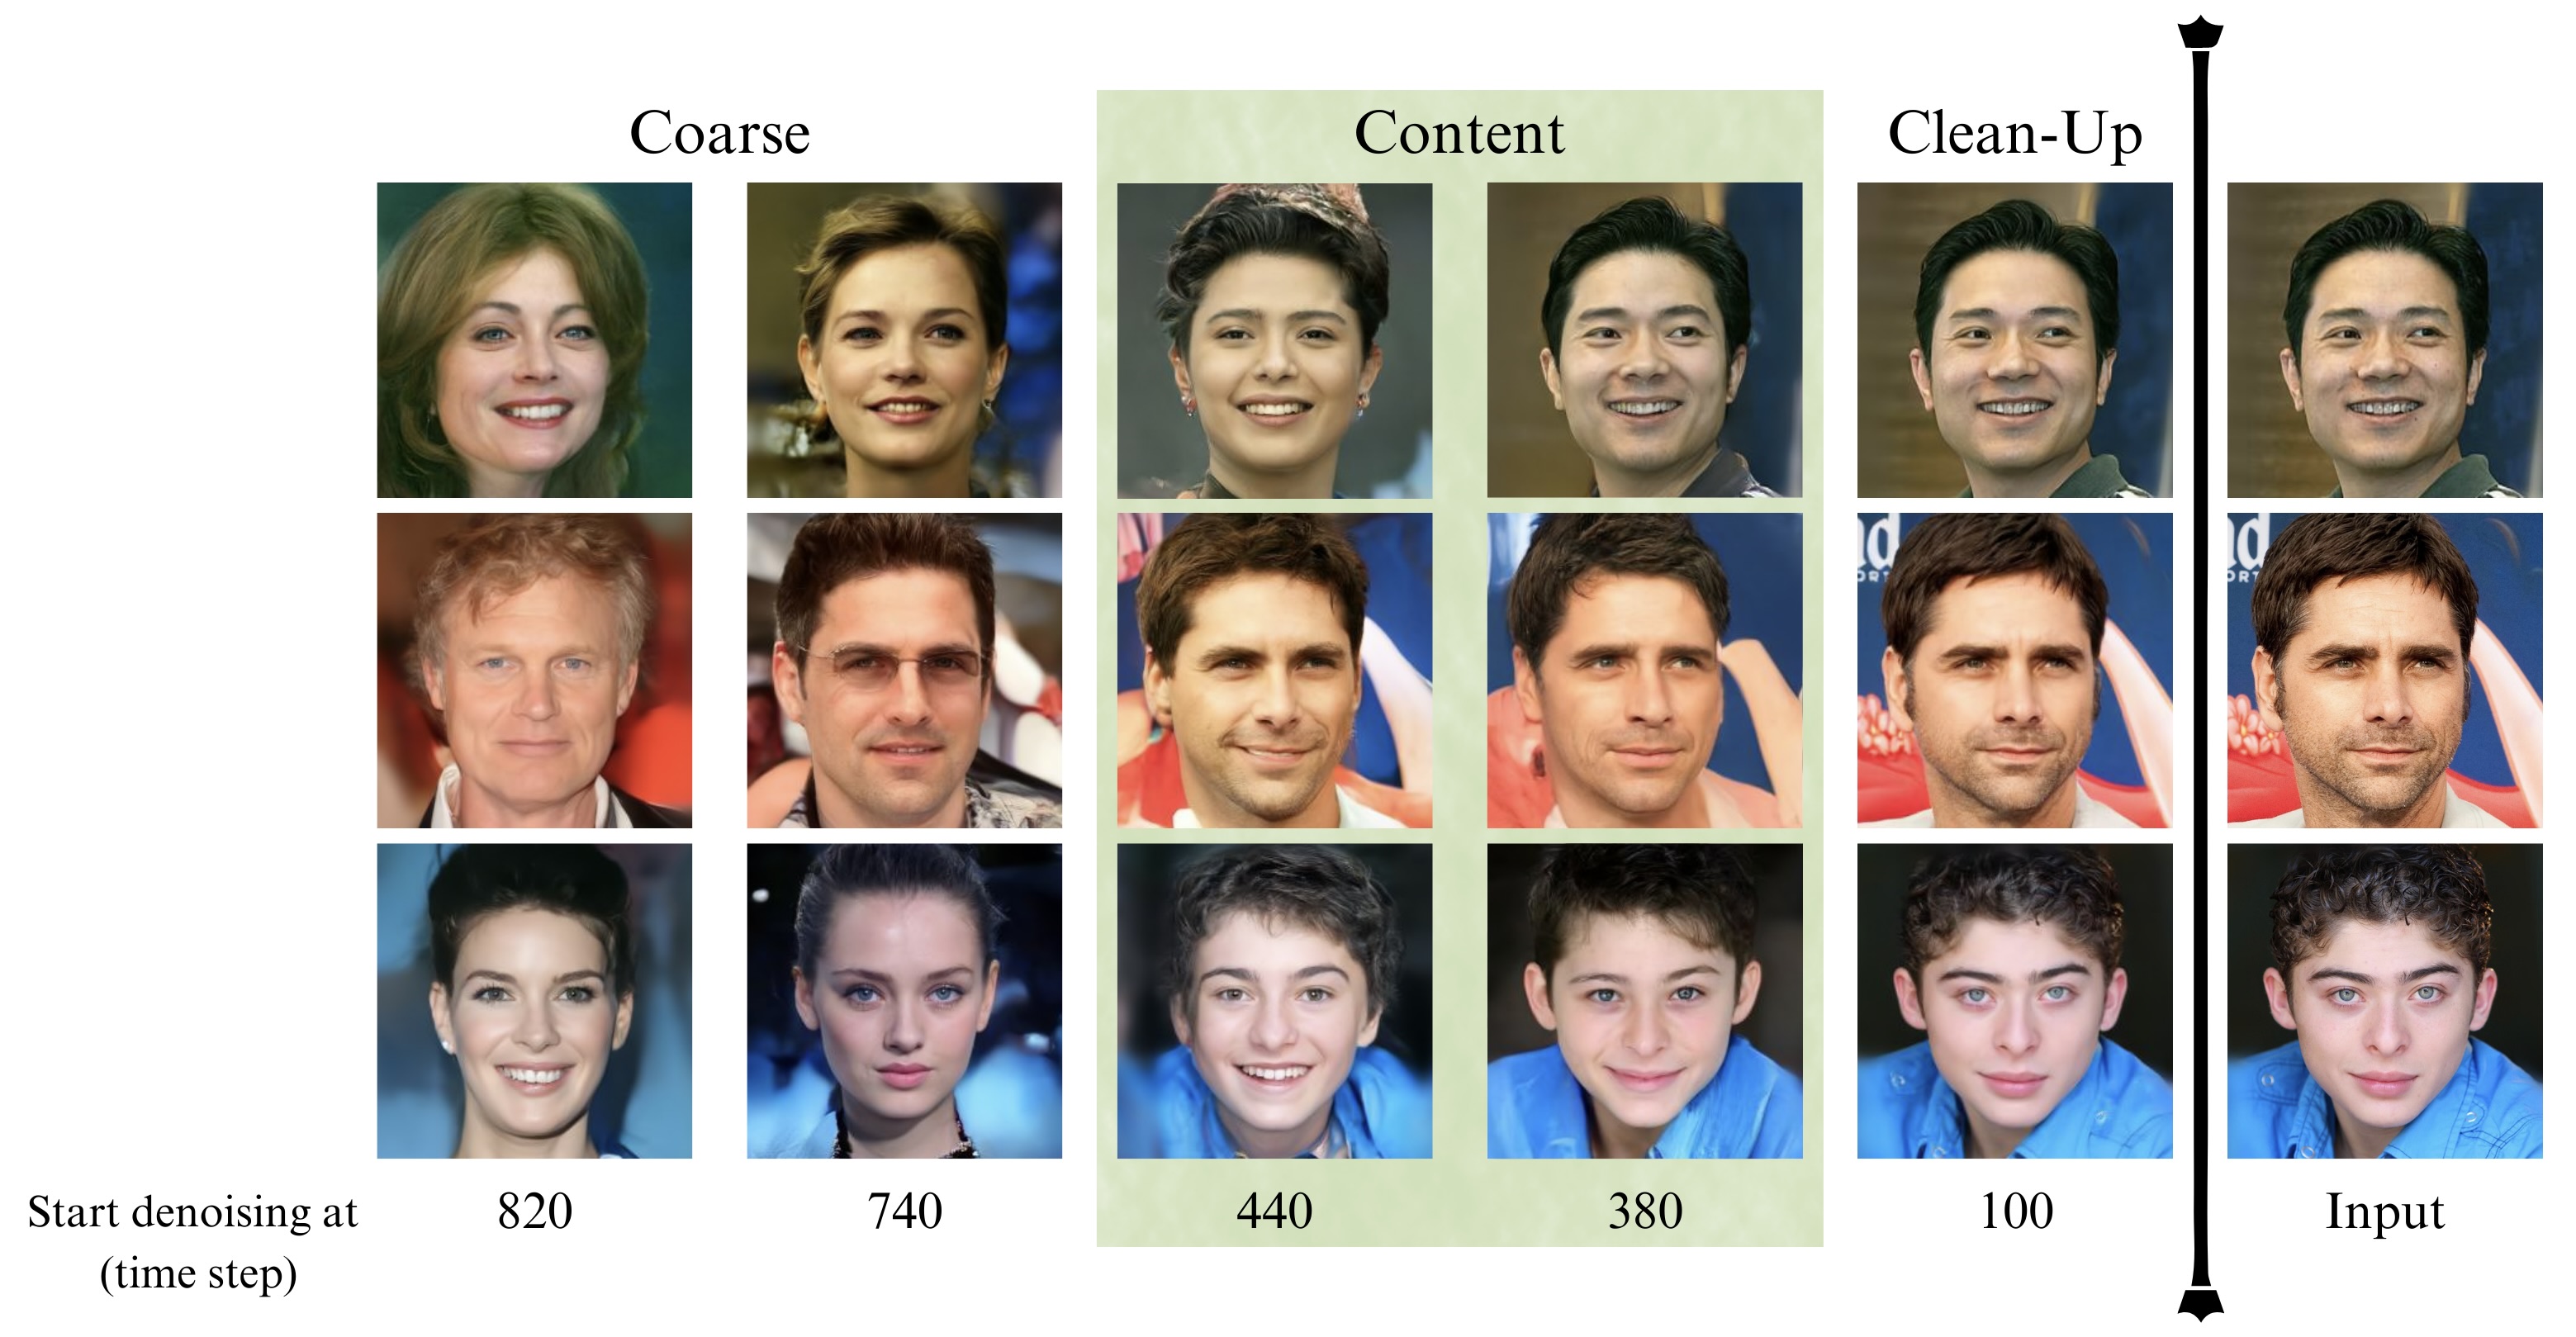
DDIM Noise Comparative Analysis Pipeline
Research question: What visual concepts do the diffusion models learn from each noise level during training?
The P2 weighting (CVPR 2022) paper proposed an approach to answer the above question, which is their second contribution.
The approach consists of the following steps:
The input is an image x0.
Perturb it to xt using a diffusion process q(xt|x0).
Reconstruct the image with the learned denoising process pθ(ˆx0|xt).
Compare x0 and ˆx0 among various t to show how each step contributes to the sample. The authors used openai/guided-diffusion model to denoise images in FFHQ dataset. This pipeline extends their second contribution by investigating DDIM on any input image.
import torch
from PIL import Image
import numpy as np
image_path = "path/to/your/image"
image_pil = Image.open(image_path)
image_name = image_path.split("/")[-1].split(".")[0]
device = torch.device("cpu" if not torch.cuda.is_available() else "cuda")
pipe = DiffusionPipeline.from_pretrained(
"google/ddpm-ema-celebahq-256",
custom_pipeline="ddim_noise_comparative_analysis",
)
pipe = pipe.to(device)
for strength in np.linspace(0.1, 1, 25):
denoised_image, latent_timestep = pipe(
image_pil, strength=strength, return_dict=False
)
denoised_image = denoised_image[0]
denoised_image.save(
f"noise_comparative_analysis_{image_name}_{latent_timestep}.png"
)
Here is the result of this pipeline (which is DDIM) on CelebA-HQ dataset.
CLIP Guided Img2Img Stable Diffusion
CLIP guided Img2Img stable diffusion can help to generate more realistic images with an initial image by guiding stable diffusion at every denoising step with an additional CLIP model.
The following code requires roughly 12GB of GPU RAM.
from io import BytesIO
import requests
import torch
from diffusers import DiffusionPipeline
from PIL import Image
from transformers import CLIPFeatureExtractor, CLIPModel
feature_extractor = CLIPFeatureExtractor.from_pretrained(
"laion/CLIP-ViT-B-32-laion2B-s34B-b79K"
)
clip_model = CLIPModel.from_pretrained(
"laion/CLIP-ViT-B-32-laion2B-s34B-b79K", torch_dtype=torch.float16
)
guided_pipeline = DiffusionPipeline.from_pretrained(
"CompVis/stable-diffusion-v1-4",
custom_pipeline="/home/njindal/diffusers/examples/community/clip_guided_stable_diffusion.py",
clip_model=clip_model,
feature_extractor=feature_extractor,
torch_dtype=torch.float16,
)
guided_pipeline.enable_attention_slicing()
guided_pipeline = guided_pipeline.to("cuda")
prompt = "fantasy book cover, full moon, fantasy forest landscape, golden vector elements, fantasy magic, dark light night, intricate, elegant, sharp focus, illustration, highly detailed, digital painting, concept art, matte, art by WLOP and Artgerm and Albert Bierstadt, masterpiece"
url = "https://raw.githubusercontent.com/CompVis/stable-diffusion/main/assets/stable-samples/img2img/sketch-mountains-input.jpg"
response = requests.get(url)
init_image = Image.open(BytesIO(response.content)).convert("RGB")
image = guided_pipeline(
prompt=prompt,
num_inference_steps=30,
image=init_image,
strength=0.75,
guidance_scale=7.5,
clip_guidance_scale=100,
num_cutouts=4,
use_cutouts=False,
).images[0]
display(image)
Init Image

Output Image

