Path: blob/master/site/en-snapshot/addons/tutorials/losses_triplet.ipynb
39162 views
Copyright 2020 The TensorFlow Authors.
TensorFlow Addons Losses: TripletSemiHardLoss
 View source on GitHub
Overview
This notebook will demonstrate how to use the TripletSemiHardLoss function in TensorFlow Addons.
Resources:
TripletLoss
As first introduced in the FaceNet paper, TripletLoss is a loss function that trains a neural network to closely embed features of the same class while maximizing the distance between embeddings of different classes. To do this an anchor is chosen along with one negative and one positive sample. 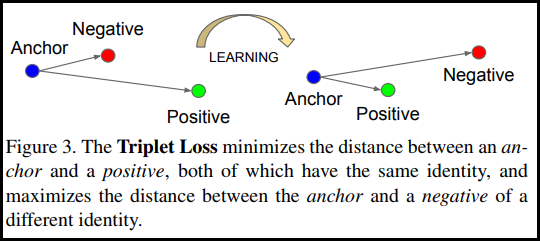
The loss function is described as a Euclidean distance function:

Where A is our anchor input, P is the positive sample input, N is the negative sample input, and alpha is some margin you use to specify when a triplet has become too "easy" and you no longer want to adjust the weights from it.
SemiHard Online Learning
As shown in the paper, the best results are from triplets known as "Semi-Hard". These are defined as triplets where the negative is farther from the anchor than the positive, but still produces a positive loss. To efficiently find these triplets you utilize online learning and only train from the Semi-Hard examples in each batch.
Setup
Prepare the Data
Build the Model

Train and Evaluate
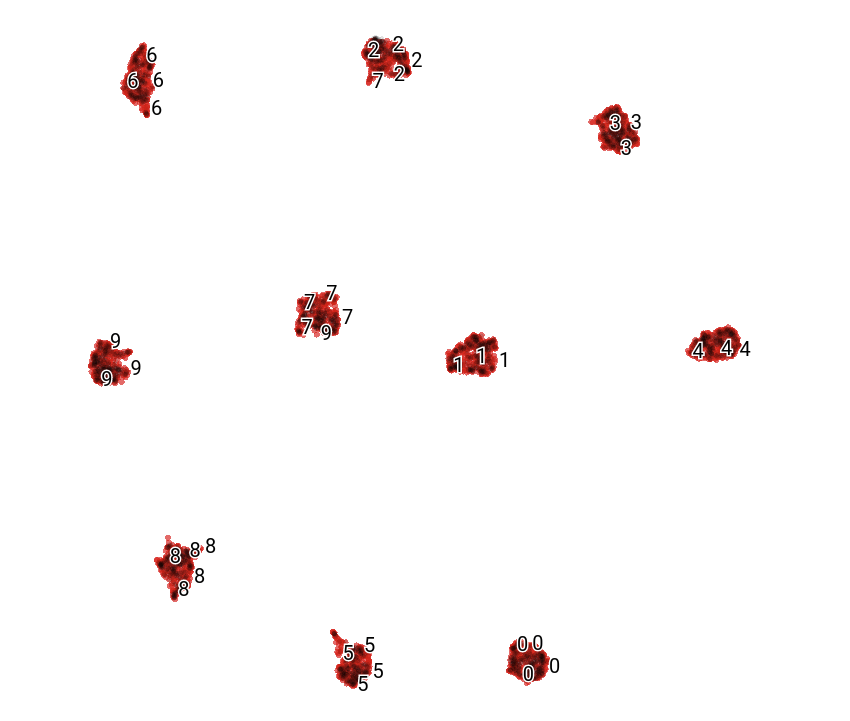
Embedding Projector
The vector and metadata files can be loaded and visualized here: https://projector.tensorflow.org/
You can see the results of our embedded test data when visualized with UMAP: